#**{{Effect|Undead Prison}} (Stun, Powerdrain-DOT, Crushing-DOT): If you get caught by a bone-claw ({{Monster|unearthed bones}}).
#*Adds: [[septic salive]] (purpose [[need]])
#*Adds: [[septic salive]] (purpose [[need]])
#*Before a bone-claw tries to cache you a white target-circle appears on the ground.[[File:WhiteCircleOnTheGround.jpg|thumb|Named is aiming by multiple white target-circles on the ground for the next bown-claw attacks.]]
#*Before a bone-claw tries to cache you a white target-circle appears on the ground.[[File:WhiteCircleOnTheGround.jpg|thumb|Named is aiming by multiple white target-circles on the ground for the next bown-claw attacks.]]
−
#*If you get cought in a bone-claw, '''don't move'''. If you move you will die. Attack the bone-claw to get out again or wait.
+
#*If you get cought in a bone-claw ({{Monster|unearthed bones}}), '''don't move'''. If you move you will die. Attack the bone-claw to get out again or wait.
−
#*While you are encaged in the bone-claw your casts have no effect.
+
#*While you are encaged in the bone-claw ({{Monster|unearthed bones}}) your casts have no effect.
−
#*Ifyoudefeatanadd, [[a dread revenant]] will rise form the corpse.
+
#*When this bown-claw disappears {{monster|a dread revenant}} spawns (GUI-Text " [[a dread revenant]] will rise form the corpse.") at that location and joins the fight.
#As you have defeated the first named mobs, you can use the elevator at {{loc|-320, -40, -151}} to go further down into the mine.
#As you have defeated the first named mobs, you can use the elevator at {{loc|-320, -40, -151}} to go further down into the mine.
#Defeat {{Named|Chief Badagoosh (Epic)}} at {{loc|-241, 239, -32}} (4th encounter)<br>'''WARNING''': It looks like [[Chief Badagoosh (Epic)|Chief Badagoosh]] steals shinies out of your bags!<br>During the encounter [[Chief Badagoosh (Epic)|Chief Badagoosh]] says "Gimme gimme gimme!" and you get the GUI-Massage "[[Chief Badagoosh (Epic)|Chief Badagoosh]] wants yer shiny! (If you have one.)". So keep your bag clear!
#Defeat {{Named|Chief Badagoosh (Epic)}} at {{loc|-241, 239, -32}} (4th encounter)<br>'''WARNING''': It looks like [[Chief Badagoosh (Epic)|Chief Badagoosh]] steals shinies out of your bags!<br>During the encounter [[Chief Badagoosh (Epic)|Chief Badagoosh]] says "Gimme gimme gimme!" and you get the GUI-Massage "[[Chief Badagoosh (Epic)|Chief Badagoosh]] wants yer shiny! (If you have one.)". So keep your bag clear!
Line 123:
Line 123:
#*During the fight party-members get a curable cures. Cure it asap or one of the Named will port to the pary-member and instant kill him/her.
#*During the fight party-members get a curable cures. Cure it asap or one of the Named will port to the pary-member and instant kill him/her.
#*First defeat [[Evisceraptor]] and then [[Sickleclaw]]
#*First defeat [[Evisceraptor]] and then [[Sickleclaw]]
The user Likukfuw has declared this page a Work In Progress
Please use the talk page to communicate your input while this tag is present
If it left unchanged for an extended period of time, you may remove the tag.
In this zone timing of curing is for some special curses very very important. Any mistake will be punished with immidialtly death (at least of the cursed) and increase your deathcounter of your encounter. So it is hardly suggest to have a makro like "/gsay CURE {my Name} NOW, pls" & "/raid CURE {my Name} NOW, pls".
The zone has following resolve-sections:
Resolve 3740 for the 1. to 5. encounters
Resolve 3865 for the 6. to 9. encounters
Resolve 4030 for the 10. to 13. encounters (including the p.i.t.a.-encounter.no13)
Resolve 4135 for the zone-boss (14. encounter and quiet easy...as you will have trained all required actions by defeating the previouse encounters)
In the zone you have a porter-network (cogs on the floor). Based on your progress in the zone, the accoriding porters are activated. Following ports are available:
Unyielding Onslaught I (DOTs & Powerdrain over time): Uncureable curse every raid-member gets with start of the encounter.
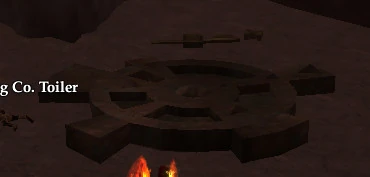
Spinning Cogs
During the fight also adds named a widow maker spawn and start to significantly heal The Iron Widow. Defeat them ASAP...
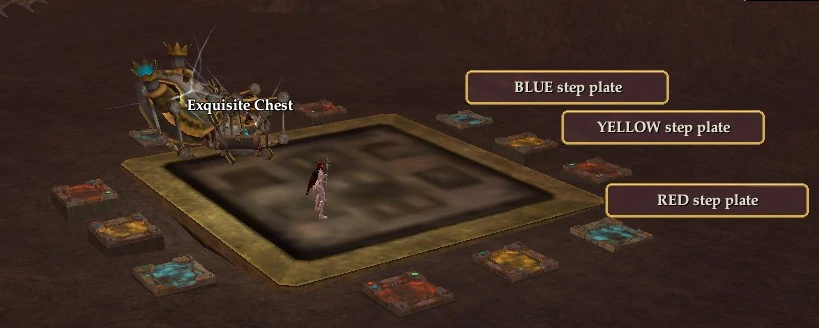
The Iron Widow stands on its magnetic platform (see also its effect Mechnamagnetica) and is at the begin of the fight immune to any damage. The platform has on each side three colored pedestal (see picture).
The Plattform of The Iron Widow (Epic) with it's colored pedestals
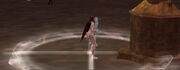
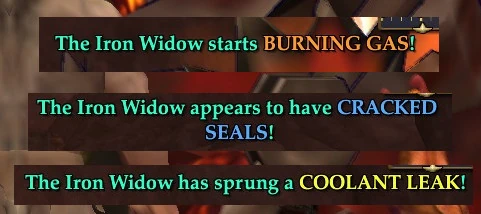
During the fight The Iron Widow switches states by informes you on screen (see picture as the text ends in diffrent colored words!) and in GUI-Massage (narrative)-type
Three examples of the "colored" massage of The Iron Widow (Epic)
. Each effect starts with 4 incremants, which can be reduced by standing on the according collored plates at the 4 sides of the platform. Sometimes you have to mix the required color by standing on different colored plates. The state-switch-script does:
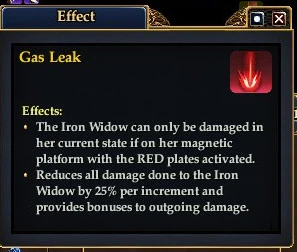
Gas Leak "RED": Distribute everybody only on the red plates on all 4 sides of the platform to mitigate the detrimental [information needed] and reduce the increments of this state-effect:
Gas Leak effect
The Iron Widow can only get damage if it stands on the platform.
Each increment of the effect reduces 25% of the incomming damage to The Iron Widow...and provides to it bonuses to the outgoing damage.
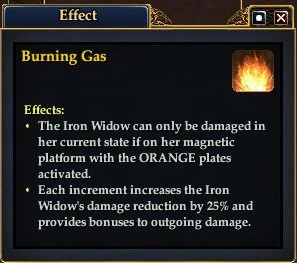
Burning Gas "ORANGE": Distribute everybody only on the red+green plates on all 4 sides of the platform to mitigate the detrimental [information needed] and reduce the increments of this state-effect:
Burnign Gas effect
The Iron Widow can only get damage if it stands on the platform.
Each increment of the effect increases 25% of the damage reduction of The Iron Widow...and provides to it bonuses to the outgoing damage.
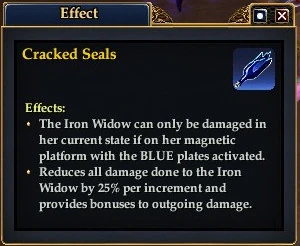
Cracked Seals "BLUE": Distribute everybody only on the blue plates on all 4 sides of the platform to mitigate the detrimental [information needed] and reduce the increments of this state-effect:
Cracked Seals effect
The Iron Widow can only get damage if it stands on the platform.
Each increment of the effect reduces 25% of the incomming damage to The Iron Widow...and provides to it bonuses to the outgoing damage.
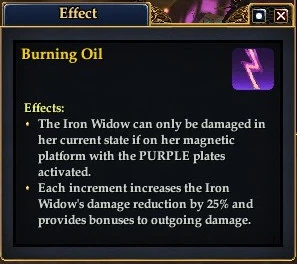
Burning Oil "PURPLE": Distribute everybody only on the red+blue plates on all 4 sides of the platform to mitigate the detrimental [information needed] and reduce the increments of this state-effect:
Burning Oil effect
The Iron Widow can only get damage if it stands on the platform.
Each increment of the effect increases 25% of the damage reduction of The Iron Widow...and provides to it bonuses to the outgoing damage.
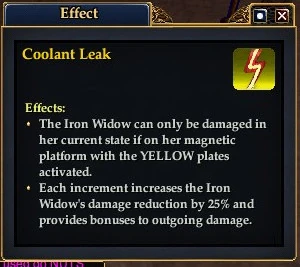
Coolant Leak "YELLOW": Distribute everybody only on the yellow plates to mitigate the detrimental [information needed] and reduce the increments of this state-effect:
Coolant Leak effect
The Iron Widow can only get damage if it stands on the platform.
Each increment of the effect increases 25% of the damage reduction of The Iron Widow...and provides to it bonuses to the outgoing damage.
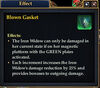
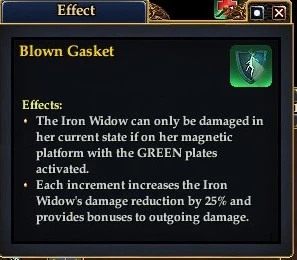
Blown Gasket "GREEN": Distribute everybody only on the green plates on all 4 sides of the platform to mitigate the detrimental Dirty Particulas and reduce the increments of this state-effect:
Blown Gasket effect
The Iron Widow can only get damage if it stands on the platform.
Each increment of the effect increases 25% of the damage reduction of The Iron Widow...and provides to it bonuses to the outgoing damage.
Dirty Particulas: Does not apply to targets standing on the GREEN plates. All others are damaged (DD & DOTs), stifled and dazed in Area (max Range [information needed]).
Overloaded Core "WHITE" (red + yellow + blue): Distribute everybody only on the red+green+blue plates on all 4 sides of the platform to mitigate the detrimental [information needed] and reduce the increments of this state-effect:
Overloaded Core effect
The Iron Widow can only get damage if it stands on the platform.
Each increment of the effect increases 25% of the damage reduction of The Iron Widow...and provides to it bonuses to the outgoing damage.
Note: Not according to the state-effecs it looks like the MT has to guide The Iron Widow on and off its magnetic platform to enable damage again. Must be verified...
Destroy wall at [information needed] by clicking on it. As it explodes get some distance to the wall...
Defeat Novinctus the Unleashed (Epic) at ( -37, -34, -106 ) Copy/waypoint -37, -34, -106 (2nd encounter)
Unyielding Onslaught I (DOTs & Powerdrain over time): Uncureable curse every raid-member gets with start of the encounter.
GUI-Massage (Narrative) "The weight of Novictus's charge cause large chunks of the cavern to collapse around you!": During the fights "red circel areas" appear on the ground (around a random raid-member). If you stand to long in that "red circle area" you will be hit by Crumpling Cavern (slow, mana-drain, DOT). Leave that "red circle area" to prevent the effect.
During the fight Novinctus the Unleashed starts sometimes to "travel on a rampage". Do not stand in its way...that becomes deadly. You can range-attack during its "journy".
Defeat Dread Lady Vezarra (Epic) at [information needed] (3rd encounter)
Mortal Coil I (Deathcount 30 etc.): Starts with the beginning of the encounter.
Detrimantals etc.
Unyielding Onslaught I (DOTs & Powerdrain over time): Uncureable curse every raid-member gets with start of the encounter.
Undead Prison (Stun, Powerdrain-DOT, Crushing-DOT): If you get caught by a bone-claw (unearthed bones).
Adds: septic salive (purpose need)
Before a bone-claw tries to cache you a white target-circle appears on the ground.
Named is aiming by multiple white target-circles on the ground for the next bown-claw attacks.
If you get cought in a bone-claw (unearthed bones), don't move. If you move you will die. Attack the bone-claw to get out again or wait.
While you are encaged in the bone-claw (unearthed bones) your casts have no effect.
When this bown-claw disappears a dread revenant spawns (GUI-Text " a dread revenant will rise form the corpse.") at that location and joins the fight.
As you have defeated the first named mobs, you can use the elevator at ( -320, -40, -151 ) Copy/waypoint -320, -40, -151 to go further down into the mine.
Defeat Chief Badagoosh (Epic) at ( -241, 239, -32 ) Copy/waypoint -241, 239, -32 (4th encounter) WARNING: It looks like Chief Badagoosh steals shinies out of your bags! During the encounter Chief Badagoosh says "Gimme gimme gimme!" and you get the GUI-Massage "Chief Badagoosh wants yer shiny! (If you have one.)". So keep your bag clear!
Spelunker's Union: every increment will increase for every add spelunker shiner. So kill the a spelunking shiner asap.
GUI-Massage (Narrative) "ARMED treasured chests spring up from the ground around the chief!": This chests will be exploding (AE damage) after a while. When the treasured chest explodes it makes AE magic damage based on distance. You can open it and then a shiny thingamajig (a shiny) will be spred over the ground. You can pick up a shiny thingamajig temporary items and use for [information needed]. During the encounter Chief Badagoosh will take it from you back and say "Stay back shiny thieves". Then a spelunking shiner graps the shiny and attacks.
Defeat Evisceraptor (Epic) and Sickleclaw (Epic) around ( 4, -248, 23 ) Copy/waypoint 4, -248, 23. (5th encounter)
Unyielding Onslaught II[information needed] (DOTs & Powerdrain over time): Uncureable curse every raid-member gets with start of the encounter.
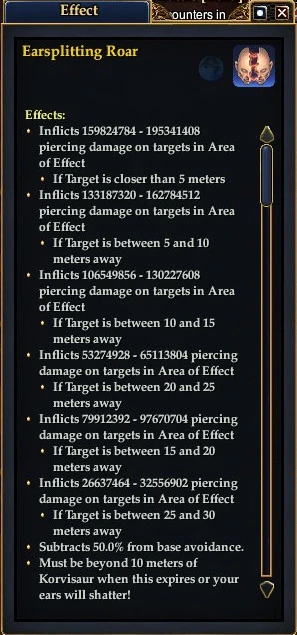
Earsplitting Roar (piercing-DD; piercing-AE; max. Range 30; etc.)
Earsplitting Roar effect
Defeat first Korvisaur, then Beastmaster Xerin and last Lord Commander Izeroth.
When the fight starts Lord Commander Izeroth will fly to the ceiling and throws bombs which will - beside damage - also kick everbody who is standing in the white target-circles on the groud.
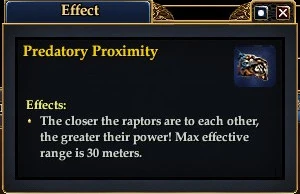
As long as Korvisaur stands the effect Dense Hide gives it a 99% damage reduction. To increase the damage you do to Korvisaur you can/should drag it into that white target-circles of Lord Commander Izeroth bombs. Then Korvisaur will lay down on the floor for a moment and you can make much more damage in that time.
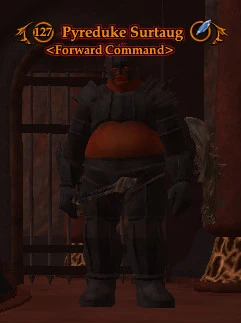
Defeat Pyreduke Surtaug (Epic) at ( -29, -337, 5 ) Copy/waypoint -29.49, -336.82, 5.06 (7th encounter), the first "more demanding" encounter (but can also - as usual - be done flawless)
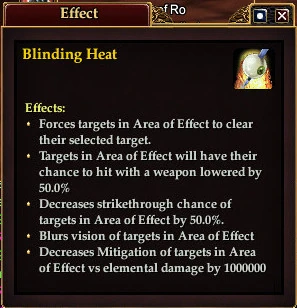
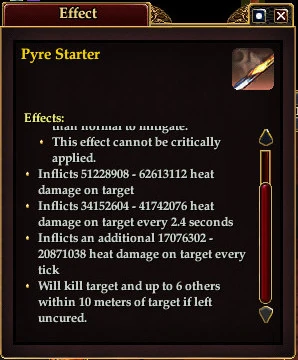
Pyre Starter (heat DD, Heat-DOT; not cured will kill you and up to 6 in range of 10m; etc.)
Pyre Starte (part of effect)
Note: Compared to heroic-version Pyreduke Surtaug (Epic) does NOT have the effect Volcanic Armor. So it is NOT required to defeat the a vulcanic fragmentation to decrease that buff.
Note: To prevent "that millions" of spawning blezing fragments to become agro, single-focus-fight and NO AE Spell usage!
During the fight more and more add a vulcanic fragmentation (non-agro, non-targetable) are coming out of the lave and then become agro. If you defeat a vulcanic fragmentation it splitts into 2 blezing fragments (non-agro!). Note: To be able to see and tag the correct barbecue skewer "a Spit On The Barbican" it is suggested that the OffTank pulls the a vulcanic fragmentation aways.
The encounter has two phases:
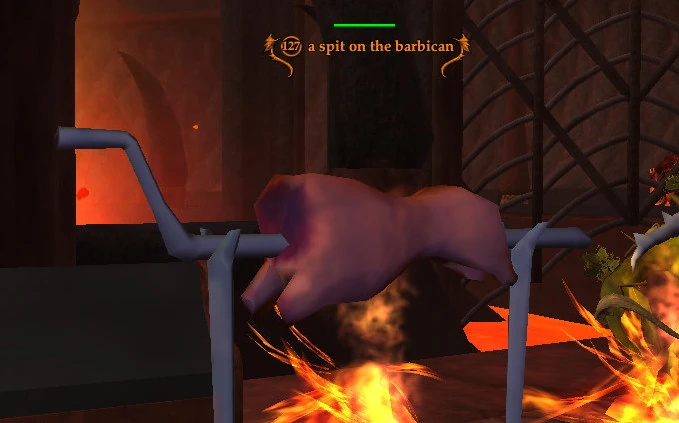
1. Phase "Roosted Members": During the fight random raid-members (first 1, then 2 and - at last - 3 raid-members will be roosted) are ported on the rooster and will be killed over time. If one roosting raid-member dies the raid wipes. Only the raid-members on the rooster can see which of the barbecue skewer "a Spit On The Barbican" (see picture
a Spit On The Barbican
) the non-roosting-raid-members have to destroy. For each destroyed "a Spit On The Barbican" one roosting-raid-members is safed and ported back... Suggestion: The roosting raid-members tag the according barbecue skewer. Also possible useing "assist target" over the roosting raid-member...as long as that have a barbecue skewer in targeted.
2. Phase Searing Storms: Raid-members are not ported anymore anymore. Searing Storm is casted by spawning twisted flames. Defeat the asap to reduce damage output of the Searing Storm effects...and don't forget to permacure the MT and - maybe - the ohter incorrigible melee-fighters, too... Suggested Range-fight as only tank must stand at the named and permacured cause of the Searing Storm. The other party-members stand more then 10m away if they can not prevent area-effects.
Mortal Coil II (Deathcount 24 etc.): Starts with the beginning of the encounter.
Dominating Presence (less then 24 raidmembers increases per increment the offensive power of the named): Starts with the beginning of the encounter.
Detrimentals
Unyielding Onslaught II (DOTs & Powerdrain over time): Uncureable curse every raid-member gets with start of the encounter.
Shreed Needles (-20.000% pot; piercing DOT, DOT-damage based on distance to Onakoome (Epic); DOT-damage increasing over time): If the raid is cursed the farest away player must be cured to cure the whole (!) raid.
Shred Needles effect
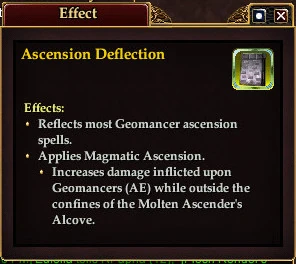
Ascension Deflection (specific ascension damage immunity): As long as adds (plural!) are spawnd/not defeated Onakoome (Epic) will have the for each Ascension-Class the according effect: Onakoome (Epic) become immune to spells of that according Ascension-Classes and makes AE-damage to that according Ascension-Classes.
Ascension Delection here geomancer-version) effect
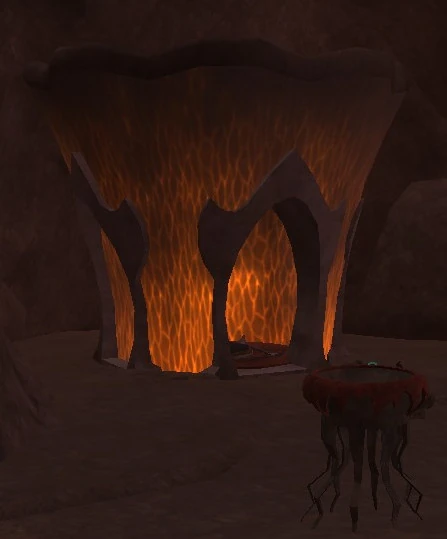
That Ascension-Adds spawn during the fight at ( -147, -368, -287 ) Copy/waypoint -147, -368, -287 inside that pavilion.
Pavilion inside which the the asendension adds will spawn.
If 4 Ascension-Adds are there, the raids is wiped.
Every type of Ascension-Class is required for this fight in your raidforce as peridically an add spawns at ( -147, -368, -287 ) Copy/waypoint -147, -368, -287 with the effect Ascension Shield on it. Because of this effect ONLY players of one Ascension-Class can see and attack it. The add does not move. You must hit this add [information needed]-times with the according Ascension-Class sothat the add will become visible and attackable for all raid-members. Then it also starts to move. Note: One of each class is enough as the count of hits makes the add visible.
At ( -53, -380, -74 ) Copy/waypoint -53, -380, -74 you can find Lady Nadjena. If you are on the quest [information needed] she gives you the next questupdate.
Use the elevator-disk a t[information needed] to go further deeper into the instance. Warning:From this point ( -163, -548, 156 ) Copy/waypoint -163, -548, 156 mobs have the expert-buff [information needed]. As you have more mobs at the same time fighting, you will have much more damage-output of the mobs...
Mortal Coil (Deathcount 24 etc.): Starts with the beginning of the encounter.
Detrimentals etc.
Unyielding Onslaught II (DOTs & Powerdrain over time): Uncureable curse every raid-member gets with start of the encounter.
Slag Driving (damage immunity; AE crushing DOT and AE Powerdrain etc.): During the fight Galadoon (Epic) can start rotating his chest and gets the effect Slag Driving and becomes rooted. To interupt it you have to defeat one add a slag fiend next to Galadoon (Epic).
During the fight Galdoon (Epic) casts [information needed], becomes rooted, immune to damage and starts to rotate his chest. To interupt it you have to
During the fight one of your group is ported into one of the cages. An other person of your group becomes cursed and get the massage "you are the key". That person has to stand very near to the cage in which the other groupmember is caught. Then you cure the curse and both are freeed...one of the curse, the other of the cage. Warning: Cured not next to the cage or last to long to find the correct cage: both dead...
During the fight Galadoon (Epic) spawns all over the place lava chunks. Next to the lava chunks you get heat-damage. You can cool down the chunks for 20 seconds by using a elemental cure on the lava chunks. As long as the lava chunks are not hit by heat-damage (e.g. of area-damage-spells) they stay cool for 20 seconds.
By now the trash-mobs have the effect Unified Force III. 2 Groups of trash can wipe the raidforce. So slow down your "move" to the next named a little.
Walkthrough - Section 3 (Resolve 4030)
Defeat Hortu the Scorched (Epic) at ( -202, -557, 222 ) Copy/waypoint -202, -557, 222 (10th encounter)
WARNING: Do not cure the noxios detrimantal [information needed] during the fight. Curing will kill you and your raid-member immidiatly.
Effects
Obsidian Guard IV (Resolve 4030)
Mortal Coil III (Deathcount 18 etc.): Starts with the beginning of the encounter.
Dominating Presence (each missing party-member to 24 will increase offensive power)
Fist of Ro (heat DD; heat DOT; Area of Effects becomes bigger and smaller over time)
Scion's Song (enpowers Hortu the Scorched (Epic); 10th increment wipes party): For each add a singeing scion everybody in the raid will get the detremental.
Detrimentals
Unyielding Onslaught IV (DOTs & Powerdrain over time): Uncureable curse every raid-member gets with start of the encounter.
Singed Skin (Heat DD; Heat DOT; 5th increment kills): For each add a singeing scion everybody in the raid will get the detremental.
The fight has two phases.
1. Phase:
During the fight a singeing scion are incoming.
After you have defeated a singeing scion a red circle will apear on the ground. Note: Further in fight in every red circle one person has to stand to make the flying carpets visible and usable (see also 2.phase)
For each a singeing scion everybody in the raid will get the detremental Singed Skin. This will kill at the 5th increment everybody.
2. Phase starts round about 40% of health of Hort the Scorched:
"Blue" add(s) will be spawn.
Each must be melee-attacked once, sothat it can move and also everybody can attack it.
To reach this adds all the carpets have to be visiable by standing in the red rings of the 1. phase.
At least one has to jump to this blue add.
At the same time a greate manadrain starts, damageoutput of the named is increased...
Use the next half-disk-elevator at ( -315, -594, 193 ) Copy/waypoint -315, -594, 193up(!) to go further deeper into the instance. Warning: Behind the next door, there a a lot of mob-groups. Because of the expert-buff this can become very critial.
Defeat Ayquini the Firemind (Epic) ( -279, -516, -96 ) Copy/waypoint -279, -516, -96 and it's sidekick Scorion (11th encounter)
Effects:
Obsidian Guard IV, Raid-Version (Resolve 4030 etc)
Mortal Coil III, Raid-Version (Deathcount 18 etc.): Starts with the beginning of the encounter.
During the fight 2 raid-members get cursed, and the GUI-controll is switched but not your GUI-view. To "cure" this curse both characters must stand next to eachother/meet. If it last to long to meet, both die... Suggestion: one stands, the other is moved. Mark both characters as not always you can see in the raid-crowed eachother.
During the fight 1 raid-member get cursed and an other get the message, that only you can cure your raid-buddy. At the moment it looks like, that anybody can cure the cursed without any impact...
During the fight Scorion creates at least two doupleganger. Each doupleganger has an according raid-member, between both there is a beam. This beams must crossed sothat the doupleganger become attackable. While there are doupleganger you can not damage Ayquini the Firemind
Position Lord Kargurak in the middle between the 12 blocks. In his buff window is a timer that counts down to zero to summon guards throughout the fight (Ro Call). They must be killed or the fight will fail. At 75%, 50% & 25% he will say "Time for roll call". Random party members (2 to 4) will have their clone appear on one of the 12 blocks. That person must click the red crystal on his/her block and type their name (sign in). Everyone go back to boss and continue DPS.
Defeat Qaaron the Usurper (Epic) at [information needed] (13th encounter)
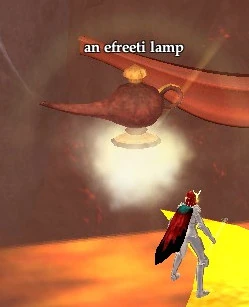
(Power-Rain for Qaaron the Usurper): For each spawned efreeti lamp not "used" by a party-member this effect gets an increment.
one of the efreeti Lamps floating over the fire abyss
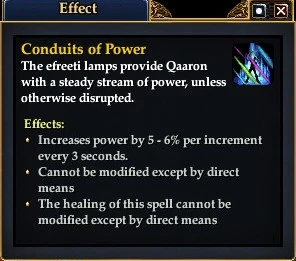
Note: It looks like, that the last bulletpoint of the effect-descriptions is an error, as the epic-version does not have any healing effects...in contrast to the heroic-version of Conduits of Power (Heroic).
Dominating Presence (less then 24 raidmembers increases per increment the power of the named)
Detrimentals etc.:
Unyielding Onslaught IV: Uncureable curse every raid-member gets with start of the encounter.
Ignite Mana (Spell, Combat-arts, ascensions now cost health etc.): GUI-Massage (emote) "Qaaron the Usurper finds another target in {name} to Ignite Mana".To "cure" this effect Qaaron the Usurper must curse you again...and also dying "curse" it... Warning: The incomming "damage" will also hit everybody of your raid in 5m range of you.
Controlled Conflagration (Crit & CritBonus reduction and kill all curesed if not cured correctly and in time): A group of the raid-pary is cursed BUT only one is "sepcial cursed". Have a makro telling the raid who must be cured in time.
"One of you is not like the others...": If you are cured, only you will be killed...at the moment.
"...you are not like the others..." : If you are cured, all of the cursed-group is cured.
Spit Fire (uncureable; AE Heat-DD; AE Heat-DOT; AE decreases Pot etc.): AE attack of the adds the Usurper's fireguard will curse you if you are hit.
Thermal Interference (Epic) ("uncureable"; AE DPS reduction; +50% incomming heat-damage etc.): AE attack of of the adds the Usurper's fireguard will curse you if you are hit. Fear, mesmerize or stun the add to "cure" this detrimental.
Note: A lot of increments of the combination of Thermal Interference and Spit Fire and "not cure efreeti lamp-users" (by group-cures) can become a problem (no damage-output, increased incomming damage). So single cure pary-members and stun/fear/mezz the according adds to get ride of both effects.
When a efreeti Lamp is summoned you will get GUI-Massage "Qaaron the Usurper summons another lamp!".
During the figth more and more the Usurper's fireguard with Burning Manifestation (hast; autoattack-heal; summons pet a burning manifestation) will add the encounter.
You have to defeat a burning manifestation next to a firepit
one of the Firepits you have to enlight
to lite the firepit. Then your get the accoriding bridges to - if already summoned - a efreeti lamps...Now you are able to reach the lamp. Note:You get an accoridngn GUI-Massage (Narrative) "The coals from the nearby firepit ignite from the burning manifestation's blazing explosion!".
Power Conduit (Epic) (-85% incomming damag; increased range of all abilities/spells etc.): If you click the efreeti lamp you will disrupt the Conduits of Power
Conduits of Power effect in the epic-version
of Qaaron the Usurper) (reducing it by 1 increment) as long as you stand in range < 20m to the efreeti lamp. Note: This effect is classified as a detrimental and can be cured. As it is a "negativ detrimental" you do not want to have it cured...If the lamp-"curse" is cured by e.g. a groupcure, instantly re-klick the lamp to disrupt it and get the effects again. Note: If you are stund at "your" lamp, some GUI tells you that you can not use every ability. Thats a bug. You can use every ability/spell even the GUI shows "gray"/"red" the hotkey.
Warning:Qaaron the Usurper (Heroic) can destroy firebridges by turn off the fire in the according pit. The groupmember standing on the bridge will then fall and die (Revive in the chamber and rejoin the fight!). As long as it is not bypassable, tank Qaaron the Usurper as far as possible from the firepits.
Use the red glowing portal at ( 10, -601, -268 ) Copy/waypoint 10, -601, -268 to the Gong of Ro.
Use the Gong of Ro at ( -414, -589, -160 ) Copy/waypoint -414, -589, -160 to port into Scald lare.
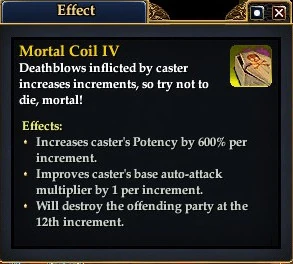
Mortal Coil IV (Deathcount 12 etc.): Starts with the beginning of the encounter.
Mortal Coil IV effect
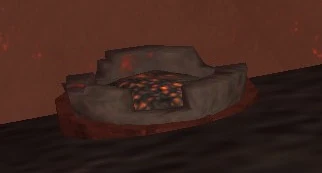
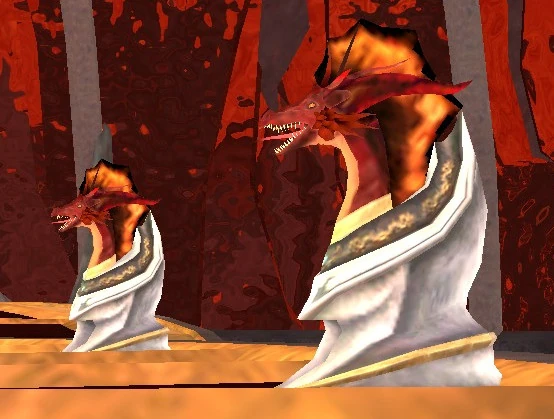
Nagafen's Favor starts with the beginning of the encounter. It has two states, depending on how many Icon of Flames, distirbute around the platform on which Scald is rooted, are "active".
two Icon of Flames not "active"
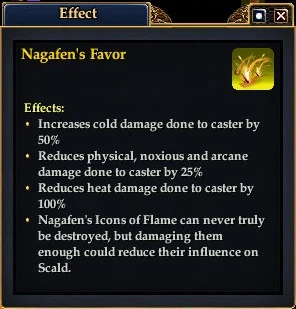
Nagafen's Favor without any increment adapts damage done vs Scald:
Nagafen's Fevor effect with no increment active
+50% for cold-damage
-25% for pysical, noxious and arcane damage
-100% for heat damage
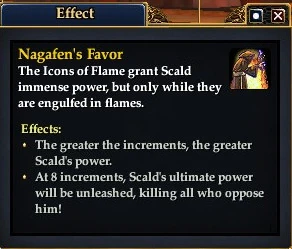
Nagafen's Favor with at least one Increment increases Scald's power per increment and at 8th increment will wipe the raidforce.
Nagaven's Favor effect with at least 1 Icon of Flames is active
Detrimentals etc.
a molten chrysalis spawn. Destroy it asap, as after a while [information needed] will replace that "egg" and attack the raidforce.


.jpg)
.jpg)
_item_anEfreetiLamp.jpg)