#Defeat {{Named|Qaaron the Usurper (Heroic)}} at {{Need}} (13th encounter)
#Defeat {{Named|Qaaron the Usurper (Heroic)}} at {{Need}} (13th encounter)
#*Effects:
#*Effects:
−
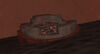
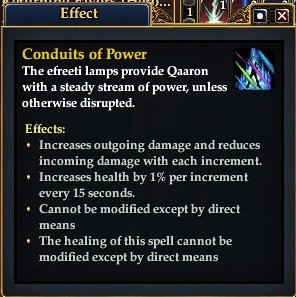
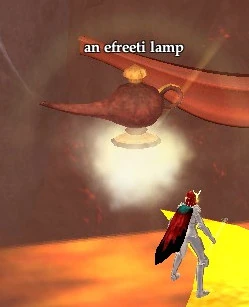
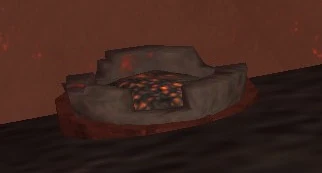
#**{{Effect|Conduits of Power (Heroic)}} [[File:Effect_ConduitsOfPower_(Epic).jpg|thumb|100px|Conduits of Power effect in the epic-version]] (increases outgoing damage; decreases incomming damage; Health-Rain for [[Qaaron the Usurper (Heroic)|Qaaron the Usurper]]): For each spawned efreeti lamp not "used" by a party-member this effect gets an increment and the effects become stronger.[[File:13_QuaaronTheUsurper(Epic)_item_anEfreetiLamp.jpg|thumb|100px|one of the efreeti Lamps floating over the fire abyss]]
+
#**{{Effect|Conduits of Power (Heroic)}} (increases outgoing damage; decreases incomming damage; Health-Rain for [[Qaaron the Usurper (Heroic)|Qaaron the Usurper]])[[File:13_effect_ConduitsOfPower(Heroic).jpg|thumb|100px|Heroic version fo Coduits of Power]]: For each spawned efreeti lamp not "used" by a party-member this effect gets an increment and the effects become stronger.[[File:13_QuaaronTheUsurper(Epic)_item_anEfreetiLamp.jpg|thumb|100px|one of the efreeti Lamps floating over the fire abyss]]
#*Detrimentals etc.:
#*Detrimentals etc.:
−
#**[[Unyielding Onslaught IV]]: Uncureable curse every party-member gets with start of the encounter.
+
#**[[Unyielding Onslaught III]]: Uncureable curse every party-member gets with start of the encounter.
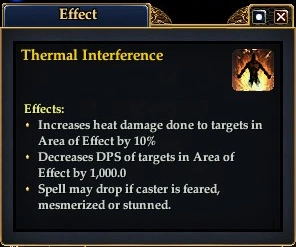
#**{{Effect|Terminal Interference (Heroic)}} ("uncureable"; AE DPS reduction; +10% incomming heat-damage etc.)[[File:13_effect_TermalInterference(Heroic).png|thumb|100px|the heroic version of the Thermal Inerference effect]]: AE-Attack of the adds {{Monster|the Usurper's fireguard}} will curse you if you are hit.<br>'''Note''': Fear, mesmerize or stun the add to "cure"/get rid of this detrimental.
#**{{Effect|Terminal Interference (Heroic)}} ("uncureable"; AE DPS reduction; +10% incomming heat-damage etc.)[[File:13_effect_TermalInterference(Heroic).png|thumb|100px|the heroic version of the Thermal Inerference effect]]: AE-Attack of the adds {{Monster|the Usurper's fireguard}} will curse you if you are hit.<br>'''Note''': Fear, mesmerize or stun the add to "cure"/get rid of this detrimental.
#**{{Effect|Controlled Conflagration_(Heroic)|Controlled Conflagration}} (Heat-DD & -DOT; CritChance and CritBonus reduction; kills you if not cured)
#**{{Effect|Controlled Conflagration_(Heroic)|Controlled Conflagration}} (Heat-DD & -DOT; CritChance and CritBonus reduction; kills you if not cured)
Revision as of 14:44, 18 September 2020
The user Likukfuw has declared this page a Work In Progress
Please use the talk page to communicate your input while this tag is present
If it left unchanged for an extended period of time, you may remove the tag.
At the moment, there is no solo-instance available...sadly :(
In this zone timing of curing is for some special curses very very important. Any mistake will be punished with immidialtly death (at least of the cursed) and increase your deathcounter of your encounter. So it is hardly suggest to have a makro like "/gsay CURE {my Name} NOW, pls".
In the zone you have a porter-network (cogs on the floor). Based on your progress in the zone, the accoriding porters are activated. Following ports are available:
Mortal Coil (Deathcounter at 10 etc.): Starts with the beginning of the encounter.
Detrimentals etc.
Unyielding Onslaught I: Starts with the beginning of the encounter. Uncureable "DD/DOT & Powerdrain".
Barrage: Volcanic Burst I: Countered by Bulwark of Order, fighter spell...
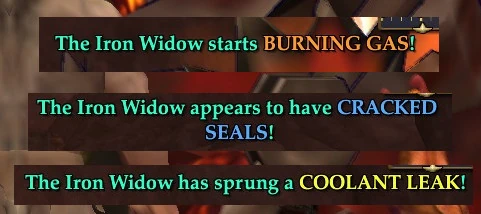
During the fight The Iron Widow informes you about something (see picture)
Three examples of the "colored" massage of The Iron Widow (Epic)
. Be aware that the text ends in diffrent colored words! At the moment it is unclear if this text has any effects on the heroic encounter [information needed].
During the fight a widow maker monsters can spawn, doing no damage but starts to heal The Iron Widow with Unfrazzled Connectors 87kkk (~1% of the named HP) every 15 seconds. Defeat them asap...?...
a widow drone spawn, "only" heat-autoattacking
Strategies
Tank'n spank.
You can pull this mob all the way to the zone in location. Farther away from the spawning adds.
Destroy the wall at ( -215, -21, -82 ) Copy/waypoint -215, -21, -82.
Defeat Novinctus the Unleashed (Heroic) (2nd encounter) at ( -37, -34, -106 ) Copy/waypoint -37, -34, -106
Mortal Coil (Deathcounter at 10 etc.): Starts with the beginning of the encounter.
Detrimentals etc.
Unyielding Onslaught I: Starts with the beginning of the encounter. Uncureable "DD/DOT & Powerdrain".
During the fight Novinctus the Unleashed (Heroic) starts after an emote "lowers his massive horned head and rushes you!" to run around and charges everybody who is in its way doing damage. After a while (or hitting a wall) the rampage ends. During it's travel you can make damage.
Ther are adds like a swooping pterodon, Template:An invading pterodon, Template:An invading remnant, Template:An invading Sathrian, Template:An invading echo etc. join the fight with e.g. Narrative "Hungry pterodon begin to swoop down from above".
Strategies
Tank'n spank in front of a wall.
Defeat Dread Lady Vezarra (Heroic) (3rd encounter) at [information needed]
Unyielding Onslaught I: Starts with the beginning of the encounter. Uncureable "DD/DOT & Powerdrain".
Keep Away: cold-DOT and only be cured as you stand at a specific distance to Chief Badagoosh (Heroic). If you stand at the wrong distance and you are cured then you will be instant killed.
Tank'n spank
Defeat Evisceraptor (Heroic) and Sickleclaw (Heroic) (5th eoncounter) around ( 4, -248, 23 ) Copy/waypoint 4, -248, 23.
Unyielding Onslaught I: Starts with the beginning of the encounter. Uncureable "DD/DOT & Powerdrain".
GUI-Massage (Narrative) "The reptors acquire a taste for {a specific class}", e.g. Fighter: Evisceraptor (Heroic) rushes to the "last" (of that class) that is claw-marked.
GUI-Massage (Narrative) "The reptors have thirst for {a specific class}", e.g. Mage. Depending on your class you will the according detremental
Priest: Template:Bleeding Mana (all Power-costs are converted to Health-costs) and Priest Bloodthirst (increased incoming damage; increases potency by 20.000%)
Korvisaur (Heroic) additonally Dense Hide (Damage reduction by 99%)
Lord Commander Izeroth (Heroic) additonally War Sokokar (auto-attack improvements etc.)
Detrimentals etc.
Unyielding Onslaught II: Starts with the beginning of the encounter. Uncureable "DD/DOT & Powerdrain".
When the fight starts Lord Commander Izeroth (Heroic) will fly to the ceiling and throws Sokokar Bomb. Everbody who is standing in the white target-circles of a Sokokar Bombs will be kicked, gets heat-damage and a mana-drain.
As long as Korvisaur (Heroic) stands the effect Dense Hide gives it a 99% damage reduction. To bypass the Dense Hide-effect drag Korvisaur (Heroic) into that white target-circles of Lord Commander Izeroth (Heroic) bombs. Then Korvisaur (Heroic) will lay down on the floor for a moment and you can make much more damage during that time.
GUI-Massage (Narrative) "Korvisaur is about to loose an earsplitting roar!": Earsplitting Roar: Based on the range to Korvisaur (Heroic) everybody will get damage (closer: more far away less damage, max range 25m). Additionally it reduces 50% of your base avoidance. So you can joust it an go at 26m+ distance...
Strategies
Defeat first Korvisaur (Heroic), then Beastmaster Xerin (Heroic) and last Lord Commander Izeroth (Heroic).
Volcanic Armor (more adds --> more damage, more armore of named): Starts with the beginning of the encounter
Mortal Coil (Deathcounter 8 etc.): Starts with the beginning of the encounter
Detrimentals etc.
Unyielding Onslaught II: Starts with the beginning of the encounter. Uncureable "DD/DOT & Powerdrain".
GUI-Massage (Narrative) "Pyreduke Surtaug's power heat up from the incoming volcanic framgentations!": Blinding Heat (decreases Mitigation, switch target, etc.)
Searing Storm (can be cured, DPS-decrease every 3 sec, 10th increment kills etc.)
Withering Winds (can be cured, Power-drain, 10th increaments kills)
Strategies
Use single-focus and NO AE to prevent a blezing fragment-adds to splitting.
The encounter has two phases:
1. Phase "Backups are incomming"
GUI-Massage (Narrative) "Heh, looks like I got some backup!": One a vulcanic fragmentation is slowly comming out of the lava ditch and increase the effect Volcanic Armor of Pyreduke Surtaug (Heroic). Fearing, stunning and mesmerizing will also reduce the increment-effect on Pyreduke Surtaug (Heroic). If you defeat a vulcanic fragmentation it becomes two a blezing fragment (unfortunatly agro so they join the fight) and one increment of the effect Volcanic Armor of Pyreduke Surtaug (Heroic) is reduced. BUT if you can controll them to reduce the increments...
If you defeat one a blazing fragmentation it splitts into two blezing fragments...so ignore it.
2. Phase Searing Storms: new a vulcanic fragmentation is not incomming anymore...but the blezing fragments stay Searing Storm is casted by spawning twisted flames. Defeat that adds asap to reduce damage output of the Searing Storm effects...and don't forget to permacure the MT and - maybe - the ohter incorrigible melee-fighters, too...
Suggested Range-fight as only tank must stand at the named and permacured cause of the Searing Storm which is cast by twisted flames.
The other party-members stand more then 10m away if they can not prevent area-effects.
Mortal Coil (Deathcounter 8 etc.): Starts with the beginning of the encounter
Detrimentals etc.
Unyielding Onslaught II: Starts with the beginning of the encounter. Uncureable "DD/DOT & Powerdrain".
If the group is cursed the most farest away player must be cured to cure the whole group. If not cured in time...you are killed.
During the encounter an "ascendention element" is spawning (increases the Ascending effect) inside that alcoven. Kill it ASAP as Onakoome (Heroic) gets also an additional effect [information needed]....and you are wiped at 4th increment...
Strategy
Tank'n spank with the tail of Onakoome (Heroic) show to the alcoven. Group stand behind the named. One of the group (Healer or range-DD) goes farest away and is always curse cured if required. Note: Solo heal is a little bit difficulty as that groupwide curse is timetriggert (40sec? and not HP triggert) and you are not able to cure it a second time in time...
At ( -53, -380, -74 ) Copy/waypoint -53, -380, -74 you can find Lady Nadjena. If you are on the quest [information needed] she gives you the next questupdate.
Use the elevator-disk a t[information needed] to go further deeper into the instance. Warning: From this point ( -163, -548, 156 ) Copy/waypoint -163, -548, 156 mobs have the expert-buff [information needed]. As you have more mobs at the same time fighting, youz will have much more damage-output of the mobs...
Mortal Coil (Deathcounter 8 etc.): Starts with the beginning of the encounter
Detrimentals etc.
Unyielding Onslaught II: Starts with the beginning of the encounter. Uncureable "DD/DOT & Powerdrain".
Incineration (Cold DD, Cold DOT): Only trigger if you use single target heat spells...
Slag Driving (damage immunity; AE crushing DOT and AE Powerdrain etc.): During the fight Galdoon (Heroic) can start rotating his chest and gets the effect Slag Driving and becomes rooted. To interupt it you have to defeat one add a slag fiend next to Galdoon (Heroic).
During the fight one of your group is ported into one of the cages. An other person of your group becomes cursed and get the massage "you are the key". That person has to stand very near to the cage in which the other groupmember is caught. Then you cure the curse and both are freeed...one of the curse, the other of the cage. Warning: Cured not next to the cage or last to long to find the correct cage: both dead...
Walktrough Section 3 (Resolve 3740)
Defeat Hortu the Scorched (Heroic) at ( -202, -557, 222 ) Copy/waypoint -202, -557, 222 (10th encounter)
After you have defeated a singeing scion a red circle will apear on the ground. Note: Further in fight in every red circle one person has to stand to make the flying carpets visible and usable (see also 2.phase)
2. Phase starts after the 2 a singeing scion have been defeated (should happen round about 40% of health of Hort the Scorched):
a "Blue" add(s) will be spawn, that must be melee-attacked once, sothat it can move and also everybody can attack it. To reach this adds the carpets have to be visiable by standing in the red rings of the 1. phase. At least one has to jump to this blue add.
At the same time a greate manadrain starts, damageoutput of the named is increased...
Use the next half-disk-elevator at ( -315, -594, 193 ) Copy/waypoint -315, -594, 193up(!) to go further deeper into the instance. Warning: Behind the next door, there a a lot of mob-groups. Because of the expert-buff this can become very critial.
Defeat Ayquini the Firemind (Heroic) ( -279, -516, -96 ) Copy/waypoint -279, -516, -96 and it's sidekick Scorion (Heroic)
Position the two in the middle of the round room. Alternate DPS to keep their health even. Throughout the fight, Scorion will split off into dopplegangers. First split at 75% is two dopplegangers. Second split at 50% is four dopplegangers, third split 25% is six dopplegangers. The dopplegangers are rooted around the room. Range or melee DPS them down. When each set of dopplegangers are dead, Scorion reappears. Continues DPS on the two names until dead.
Controlled Conflagration (curse; heat-DD and -DOT; decrease DPS; kills you if not cured) GUI Massage "Qaaron the Usurper curses on you!"
Position Lord Kargurak in the middle between the 12 blocks. In his buff window is a timer that counts down to zero to summon guards throughout the fight (Ro Call). They must be killed or the fight will fail. At 75%, 50% & 25% he will say "Time for roll call". Random party members (2 to 4) will have their clone appear on one of the 12 blocks. That person must click the crystal on his/her block and type their name (sign in). Everyone go back to boss and continue DPS.
Everyone stay crouched for the entire fight to counter the "Sit in Chair" debuff.
the heroic version of the Thermal Inerference effect
: AE-Attack of the adds the Usurper's fireguard will curse you if you are hit. Note: Fear, mesmerize or stun the add to "cure"/get rid of this detrimental.
Controlled Conflagration_(Heroic) (Heat-DD & -DOT; CritChance and CritBonus reduction; kills you if not cured)
Spit Fire ([information needed]): Frontalattack of the adds the Usurper's fireguard will curse you if you are hit.
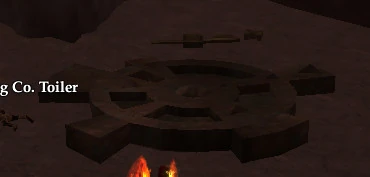
To defeat Qaaron the Usurper (Heroic) four groupmembers have to stand at one lamp on a firebridge an been stunded. The rest of the group fights Qaaron the Usurper.
the Usurper's fireguard with Burning Manifestation (hast; autoattack-heal; summons pet a burning manifestation) will add the encounter.
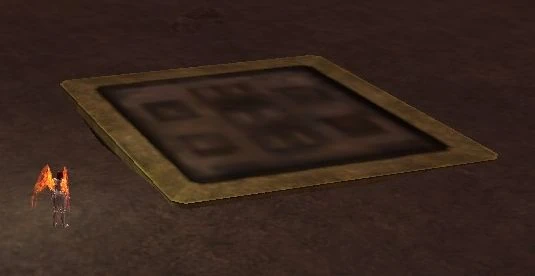
When a efreeti Lamp is summoned you will get GUI-Massage "Qaaron the Usurper summons another lamp!".
During the figth more and more the Usurper's fireguard with Burning Manifestation (hast; autoattack-heal; summons pet a burning manifestation) will add the encounter.
You have to defeat a burning manifestation next to a firepit
one of the Firepits you have to enlight
to lite the firepit. Then your get the accoriding bridges to - if already summoned - a efreeti lamps...Now you are able to reach the lamp. Note:You get an accoridngn GUI-Massage (Narrative) "The coals from the nearby firepit ignite from the burning manifestation's blazing explosion!".
Power Conduit (increased range of all abilities/spells etc.[information needed]): If you click the efreeti lamp you will disrupt the Conduits of Power of Qaaron the Usurper) (reducing it by 1 increment) as long as you stand in range < 20m to the efreeti lamp. Note: This effect is classified as a detrimental and can be cured. As it is a "negativ detrimental" you do not want to have it cured...If the lamp-"curse" is cured by e.g. a groupcure, instantly re-klick the lamp to disrupt it and get the effects again. Note: If you are stund at "your" lamp, some GUI tells you that you can not use every ability. Thats a bug. You can use every ability/spell even the GUI shows "gray"/"red" the hotkey.
Warning:Qaaron the Usurper (Heroic) can destroy firebridges by turn off the fire in the according pit. The groupmember standing on the bridge will then fall and die (Revive in the chamber and rejoin the fight!). As long as it is not bypassable, tank Qaaron the Usurper as far as possible from the pits.
Note: If the lamp-stun is cured by e.g. a groupcure, instantly retouch the lamp to get your lamp-stun again.
Note: If you are stund at "your" lamp, some GUI tells you that you can not use every ability. Thats a bug. You can use every ability/spell even the GUI shows "gray"/"red" the hotkey.
Scald is permarooted. It is exspected that you come to it...
Hint: During this fight you can cast any spell/use any ability while you are running!...So you will have to run a lot...
Scald will become imune to any damage while at least one tourch is burning. So you have to attack/destroy the buring tourch(s).
Adds have to be defeated. If you attack and destroy the large "egg", less adds are spawning.
Sometimes one groupmember will be cursed and get the message "[information needed]". If you core this groupmember, everybody of the group is also cured. If you cure the wrong groupmember that groupmember is instant dead. If the cures is not cured, only the cursed groupmember dies and the rest of the group is cured.
Strat
Everyone can stay on main round platform. All spells have increased range. Melee dps may need to jump down to hit Idols/Eggs. Be careful there is a line of sight issue if healer on platform and melee is on lower floor running around.
Rocks will drop, stay away. They will explode and you will need a cure det. Rocks can be avoided.
Kill egg (a molten chrysalis) or add pops. If adds pop then tank cannot keep agro. Just kill eggs before they hatch.
Kill Idols when they go active. (have one person as main assist) If there are 6 up it's a wipe. Idol has red fire glowy when active.
Cure curse: Only ONE person to be cured, he/she calls it out. When that person is cured, everyone gets cured.
There is no frontal attack. The tank stands in middle with one healer as everyone runs around the upper platform in a group as needed to target the eggs/idols. Then all dps back on Scald.
Use Empyral Rune: Adamant Resolve for stifle immunity.
An Alternate way to defeat Scald is to use a high DPS pet class (Summoner or BL). Have the pet stay on Scald for the duration of the fight. Everyone will stay on the lower level and autofollow/target the tank to burn eggs and idols. When no eggs or idols are up, direct all group DPS back on Scald while continuing to single cure the curse.


.jpg)
.jpg)
_item_anEfreetiLamp.jpg)
.png)