No edit summary |
Tag: Visual edit |
||
| (18 intermediate revisions by 6 users not shown) | |||
| Line 20: | Line 20: | ||
pmin = 3 hours| <!-- min time until you can release the persistence --> |
pmin = 3 hours| <!-- min time until you can release the persistence --> |
||
pmax = 3 days| <!-- max time until the active persistence expires --> |
pmax = 3 days| <!-- max time until the active persistence expires --> |
||
| + | uid =1075| |
||
}} |
}} |
||
| − | |||
| − | __TOC__ |
||
==Introduction== |
==Introduction== |
||
| Line 35: | Line 34: | ||
* You will get one of each of the first 3 groups in various parts of the zone, then one from group 4 at the {{POI|Basilica of Hate (SoH: Utter Contempt Heroic)|Basilica of Hate}}, and a final named inside {{POI|The Heart of Hate (SoH: Utter Contempt Heroic)|The Heart of Hate}}. |
* You will get one of each of the first 3 groups in various parts of the zone, then one from group 4 at the {{POI|Basilica of Hate (SoH: Utter Contempt Heroic)|Basilica of Hate}}, and a final named inside {{POI|The Heart of Hate (SoH: Utter Contempt Heroic)|The Heart of Hate}}. |
||
* Dispelling every monster in the zone is really a good idea. |
* Dispelling every monster in the zone is really a good idea. |
||
| + | * Step on the teleporters to see what torches need to be lit to activate them |
||
==Named== |
==Named== |
||
| Line 41: | Line 41: | ||
** ''To spawn, stun bubbles of hatred. Once the bubble is stunned, the cursor over it will turn into a hand. Gather a glob of hatred from the bubble. The person who collected the glob needs to click on the door {{loc|175.39|10.40|149.90|uid=}}. Repeat 5 times.'' |
** ''To spawn, stun bubbles of hatred. Once the bubble is stunned, the cursor over it will turn into a hand. Gather a glob of hatred from the bubble. The person who collected the glob needs to click on the door {{loc|175.39|10.40|149.90|uid=}}. Repeat 5 times.'' |
||
* {{Named|Hateful Plate (Heroic)|Hateful Plate}} in {{POI|Repugnance's Rectory (SoH: Utter Contempt Heroic)|Repugnance's Rectory}} at {{Loc|181.29, 7.00, 111.81|uid=}}. |
* {{Named|Hateful Plate (Heroic)|Hateful Plate}} in {{POI|Repugnance's Rectory (SoH: Utter Contempt Heroic)|Repugnance's Rectory}} at {{Loc|181.29, 7.00, 111.81|uid=}}. |
||
| − | ** ''To spawn, find the discarded armor pieces scattered throughout the entrance of the zone |
+ | ** ''To spawn, find the discarded armor pieces scattered throughout the entrance of the zone. Place the armor pieces on the mannequin at {{Loc|184|6|105}}.'' |
| + | *** Helm {{Loc|157|10|92|uid=}} (by base of tree near mannequin area) |
||
| + | *** Shoulders {{Loc|11|3|196|uid=}} |
||
| + | *** Legs {{Loc|-112|10|188|uid=}} |
||
| + | *** Chest is under a mound of loose dirt {{Loc|-177|16|129|uid=}} |
||
| + | *** Hands {{Loc|-180|25|205|uid=}}. The hands will be under a dirt pile on one of the three balconies. You will need to activate the teleporters to get up to the balcony. Speak to the skull at the zone entrance before attempting to activate the teleporters. |
||
| + | *** ''Note: Harvest Tracking will find the '''mounds of loose dirt'''.'' |
||
* {{Named|Skimp the Imp (Heroic)|Skimp the Imp}}, spawns at {{POI|Malice's Narthex (SoH: Utter Contempt Heroic)|Malice's Narthex}}, then roams along the path toward {{POI|Wrath's Anvil (SoH: Utter Contempt Heroic)|Wrath's Anvil}}. |
* {{Named|Skimp the Imp (Heroic)|Skimp the Imp}}, spawns at {{POI|Malice's Narthex (SoH: Utter Contempt Heroic)|Malice's Narthex}}, then roams along the path toward {{POI|Wrath's Anvil (SoH: Utter Contempt Heroic)|Wrath's Anvil}}. |
||
** ''Spawned by killing {{Monster|a spiteful fiend (Heroic)|spiteful fiends}} and {{Monster|a wicked fiend (Heroic)|wicked fiends}} in {{POI|Malice's Narthex (SoH: Utter Contempt Heroic)|Malice's Narthex}}, {{POI|Repugnance's Rectory (SoH: Utter Contempt Heroic)|Repugnance's Rectory}}, and along the path near {{POI|Wrath's Anvil (SoH: Utter Contempt Heroic)|Wrath's Anvil}}.'' |
** ''Spawned by killing {{Monster|a spiteful fiend (Heroic)|spiteful fiends}} and {{Monster|a wicked fiend (Heroic)|wicked fiends}} in {{POI|Malice's Narthex (SoH: Utter Contempt Heroic)|Malice's Narthex}}, {{POI|Repugnance's Rectory (SoH: Utter Contempt Heroic)|Repugnance's Rectory}}, and along the path near {{POI|Wrath's Anvil (SoH: Utter Contempt Heroic)|Wrath's Anvil}}.'' |
||
| Line 47: | Line 53: | ||
** ''Spawned by gathering the armor pieces from the {{Named|Hateful Plate (Heroic)|Hateful Plate}}, then placing them in '''a chest unlike the rest''' at {{Loc|-202.52|15.76|150.07|uid=}}.'' |
** ''Spawned by gathering the armor pieces from the {{Named|Hateful Plate (Heroic)|Hateful Plate}}, then placing them in '''a chest unlike the rest''' at {{Loc|-202.52|15.76|150.07|uid=}}.'' |
||
* {{Named|Vilegore (Heroic)|Vilegore}} |
* {{Named|Vilegore (Heroic)|Vilegore}} |
||
| − | ** ''To spawn, find '''a cooled branding iron''' on a weapon rack {{ |
+ | ** ''To spawn, find '''a cooled branding iron''' on a weapon rack {{loc|-161.27 16.32 136.69}} and heat it using the fire pit at {{Loc|-105|10|237}}, then right-click {{Monster|a hate mongrel (Heroic)|a hate mongrel}}, which causes it to change into Vilegore.'' |
===Group 2=== |
===Group 2=== |
||
* {{Named|Anarchic Obscenity (Heroic)|Anarchic Obscenity}} is at {{POI|The Abbey (SoH: Utter Contempt Heroic)|The Abbey}} {{loc|-204.29|15.99|32.58|uid=}}. |
* {{Named|Anarchic Obscenity (Heroic)|Anarchic Obscenity}} is at {{POI|The Abbey (SoH: Utter Contempt Heroic)|The Abbey}} {{loc|-204.29|15.99|32.58|uid=}}. |
||
| − | ** ''Spawned by pulling {{Monster|an anarchic |
+ | ** ''Spawned by pulling {{Monster|an anarchic lurker (Heroic)|anarchic lurkers}} to the middle of the black portal at {{Loc|-202|16|33|uid=}} and allowing the portal to absorb the lurkers. The lurkers can be found between the {{POI|Amphitheater of Rancor (SoH: Utter Contempt Heroic)|Amphitheater of Rancor}} and {{POI|The Abbey (SoH: Utter Contempt Heroic)|The Abbey}} at {{loc|-128.36|17.15|-34.79|uid=}}, {{loc|-110.45|15.53|0.09|uid=}}, and {{loc|-143.07|14.76|37.14|uid=}}.'' |
* {{Named|Lord of Pain (Heroic)|Lord of Pain}} spawns in the {{POI|Rectory of Confession (SoH: Utter Contempt Heroic)|Rectory of Confession}} {{loc|195.53|33.23|-106.13|uid=}} |
* {{Named|Lord of Pain (Heroic)|Lord of Pain}} spawns in the {{POI|Rectory of Confession (SoH: Utter Contempt Heroic)|Rectory of Confession}} {{loc|195.53|33.23|-106.13|uid=}} |
||
** ''To spawn, kill all the {{Monster|a pain bringer (Heroic)|pain bringers}} and {{Monster|an apprentice of pain (Heroic)|apprentice of pain}} around the {{POI|Rectory of Confession (SoH: Utter Contempt Heroic)|Rectory of Confession}} to spawn {{Monster|a keeper of pain}}. Kill the keeper and it will drop one of four keys, ({{Item|a circle-headed key}}, {{Item|a cross-headed key}}, {{Item|a square-headed key}}, or {{Item|a triangle-headed key}}. Under the four cages in the area are different shapes: matching the shape to the correct key, then using the key on that cage, will spawn another {{Monster|a keeper of pain}}. Repeat for all four cages.'' |
** ''To spawn, kill all the {{Monster|a pain bringer (Heroic)|pain bringers}} and {{Monster|an apprentice of pain (Heroic)|apprentice of pain}} around the {{POI|Rectory of Confession (SoH: Utter Contempt Heroic)|Rectory of Confession}} to spawn {{Monster|a keeper of pain}}. Kill the keeper and it will drop one of four keys, ({{Item|a circle-headed key}}, {{Item|a cross-headed key}}, {{Item|a square-headed key}}, or {{Item|a triangle-headed key}}. Under the four cages in the area are different shapes: matching the shape to the correct key, then using the key on that cage, will spawn another {{Monster|a keeper of pain}}. Repeat for all four cages.'' |
||
| Line 65: | Line 71: | ||
** ''After your group has killed two nameds in the zone, as well as {{Monster|Librarian Lin'Dyz (Heroic)|Librarian Lin'Dyz}}, {{Monster|Librarian Ry'Zon (Heroic)|Librarian Ry'Zon}}, and {{Monster|Librarian Zu'Vod (Heroic)|Librarian Zu'Vod}}, click the transporter pad in the {{POI|Amphitheater of Rancor (SoH: Utter Contempt Heroic)|Amphitheater of Rancor}} {{loc|26.46|7.53|-47.09}} to access the balcony, then click the '''Podium of House K'Lorn''' to spawn the Chief Librarian.'' |
** ''After your group has killed two nameds in the zone, as well as {{Monster|Librarian Lin'Dyz (Heroic)|Librarian Lin'Dyz}}, {{Monster|Librarian Ry'Zon (Heroic)|Librarian Ry'Zon}}, and {{Monster|Librarian Zu'Vod (Heroic)|Librarian Zu'Vod}}, click the transporter pad in the {{POI|Amphitheater of Rancor (SoH: Utter Contempt Heroic)|Amphitheater of Rancor}} {{loc|26.46|7.53|-47.09}} to access the balcony, then click the '''Podium of House K'Lorn''' to spawn the Chief Librarian.'' |
||
* {{Named|Gluglug (Heroic)|Gluglug}} spawns from the fountain in the {{POI|Amphitheater of Rancor (SoH: Utter Contempt Heroic)|Amphitheater of Rancor}} {{loc|-10.89|12.15|-8.91|uid=}} |
* {{Named|Gluglug (Heroic)|Gluglug}} spawns from the fountain in the {{POI|Amphitheater of Rancor (SoH: Utter Contempt Heroic)|Amphitheater of Rancor}} {{loc|-10.89|12.15|-8.91|uid=}} |
||
| − | ** ''Spawned by placing three fishbowls in the fountain, found around the zone. Possible locations include |
+ | ** ''Spawned by placing three fishbowls in the fountain, found around the zone. Possible locations include:'' |
| + | *** {{POI|The Abbey (SoH: Utter Contempt Heroic)|The Abbey}} {{Loc|-262|19|-1|uid=}} |
||
| + | *** {{POI|Basilica of Hate (SoH: Utter Contempt)|Basilica of Hate}} {{Loc|-107|31|-180|uid=}} |
||
| + | *** {{POI|Basilica of Hate (SoH: Utter Contempt)|Basilica of Hate}} {{loc|75|30|-200|uid=}} |
||
* {{Named|Helestia (Heroic)|Helestia}} spawns at a grave to one side of the {{POI|Amphitheater of Rancor (SoH: Utter Contempt Heroic)|Amphitheater of Rancor}} {{loc|39.63|7.82|-62.17|uid=}} |
* {{Named|Helestia (Heroic)|Helestia}} spawns at a grave to one side of the {{POI|Amphitheater of Rancor (SoH: Utter Contempt Heroic)|Amphitheater of Rancor}} {{loc|39.63|7.82|-62.17|uid=}} |
||
** ''To spawn, click on the grave to release {{Monster|a fettered wraith (Heroic)|a fettered wraith}}. Dispel and then kill them, then pick up the chain they drop on the ground and place the chains on the grave. Repeat until she spawns. 4 chains required'' |
** ''To spawn, click on the grave to release {{Monster|a fettered wraith (Heroic)|a fettered wraith}}. Dispel and then kill them, then pick up the chain they drop on the ground and place the chains on the grave. Repeat until she spawns. 4 chains required'' |
||
| Line 74: | Line 83: | ||
===Group 4=== |
===Group 4=== |
||
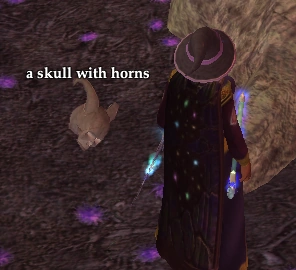
| − | * {{Named|Igidishi (Heroic)|Igidishi}} roams along the dirt below the stairs that lead to the {{POI|Basilica of Hate (SoH: Utter Contempt Heroic)|Basilica of Hate}} {{loc|-13.14|20.79|-118.00|uid=}}. |
+ | * {{Named|Igidishi (Heroic)|Igidishi}} roams along the dirt below the stairs that lead to the {{POI|Basilica of Hate (SoH: Utter Contempt Heroic)|Basilica of Hate}} {{loc|-13.14|20.79|-118.00|uid=}}.[[File:A_skull_with_horns.png|thumb|A Skull with Horns]] |
| − | ** ''To spawn, locate and click {{Item|a skull with horns|skulls with horns}} (tracking works); either they will dissolve or become attackable. Find and kill the skulls until {{Named|Igidishi (Heroic)|Igidishi}} spawns. You need a fighter in your group to kill this name!!!'' |
+ | ** ''To spawn, locate and click {{Item|a skull with horns|skulls with horns}} (tracking works); either they will dissolve or become attackable. Find and kill the skulls until {{Named|Igidishi (Heroic)|Igidishi}} spawns. You need a fighter (to see the named when he transforms into an animal) and a scout (to see the totem that matches the named's animal transformation) in your group to kill this name!!!'' |
* {{Named|Morghorb (Heroic)|Morghorb}} is west of the stairs at the {{POI|Basilica of Hate (SoH: Utter Contempt Heroic)|Basilica of Hate}} {{loc|37.76|30.60|-206.81|uid=}} |
* {{Named|Morghorb (Heroic)|Morghorb}} is west of the stairs at the {{POI|Basilica of Hate (SoH: Utter Contempt Heroic)|Basilica of Hate}} {{loc|37.76|30.60|-206.81|uid=}} |
||
** ''After killing {{Named|Horb (Heroic)|Horb}}, loot a {{Item|hatebound heart}} from its body, then click the golem at {{Loc|35|30|-200|uid=}} to spawn.'' |
** ''After killing {{Named|Horb (Heroic)|Horb}}, loot a {{Item|hatebound heart}} from its body, then click the golem at {{Loc|35|30|-200|uid=}} to spawn.'' |
||
| Line 103: | Line 112: | ||
[[File:Hate_buff.png|thumb|left]] |
[[File:Hate_buff.png|thumb|left]] |
||
<br clear="all"> |
<br clear="all"> |
||
| + | |||
==Credits== |
==Credits== |
||
{| cellspacing="0" style="width: 400px; color: #000000; background: #FFFFFF; border: solid blue 1px; margin: 1px; clear:left;" |
{| cellspacing="0" style="width: 400px; color: #000000; background: #FFFFFF; border: solid blue 1px; margin: 1px; clear:left;" |
||
Latest revision as of 12:36, 29 October 2023
|
| |||||||||||||||||||||
| |||||||||||||||||||||
What does this information mean?
Introduction[]
In the wake of Lanys T'Vyl's demise, the throne of Hate was vacant. Saryrn the Mistress of Torment and Ullkorruuk the Archtraitor battled for supremacy, each attempting to claim the seat of power for themselves - a decision they would both soon regret. Much to their dismay, the rightful god of Hate, Innoruuk, was restored and regained his throne with little effort on his part. The vile god vows that they will pay the price for their insolence and arrogance!
Woe to any traveler who dares to explore the revitalized Shard of Hate, the celestial home to the aforementioned divine father of spite and malevolence. Your presence here is unwelcome, no matter your blood, your alignment, or your past actions. All will meet merciless resistance at the hands, claws, and teeth of the newly reunified minions of Hate! But the unique treasures and great power that await inside beckon the bravest and the boldest Norrathians, as they have in ages past.
Will fate see your name added to the ranks of victorious heroes or those of the defeated insurrectors?
Notes[]
- There are 24 named mobs in this zone. You can only spawn one from each of 6 groups of monsters per run. There are 6 groups. The first 4 groups have one of 5 named you can spawn. The last group has one of 3, or you can get an additional Epic x2 at the end as well.
- You will get one of each of the first 3 groups in various parts of the zone, then one from group 4 at the Basilica of Hate, and a final named inside The Heart of Hate.
- Dispelling every monster in the zone is really a good idea.
- Step on the teleporters to see what torches need to be lit to activate them
Named[]
Group 1[]
- Fuel of Hatred appears on the stairs in Repugnance's Rectory ( 175, 10, 150 )
- To spawn, stun bubbles of hatred. Once the bubble is stunned, the cursor over it will turn into a hand. Gather a glob of hatred from the bubble. The person who collected the glob needs to click on the door ( 175, 10, 150 ) . Repeat 5 times.
- Hateful Plate in Repugnance's Rectory at ( 181, 7, 112 ) .
- To spawn, find the discarded armor pieces scattered throughout the entrance of the zone. Place the armor pieces on the mannequin at ( 184, 6, 105 ) .
- Helm ( 157, 10, 92 ) (by base of tree near mannequin area)
- Shoulders ( 11, 3, 196 )
- Legs ( -112, 10, 188 )
- Chest is under a mound of loose dirt ( -177, 16, 129 )
- Hands ( -180, 25, 205 ) . The hands will be under a dirt pile on one of the three balconies. You will need to activate the teleporters to get up to the balcony. Speak to the skull at the zone entrance before attempting to activate the teleporters.
- Note: Harvest Tracking will find the mounds of loose dirt.
- To spawn, find the discarded armor pieces scattered throughout the entrance of the zone. Place the armor pieces on the mannequin at ( 184, 6, 105 ) .
- Skimp the Imp, spawns at Malice's Narthex, then roams along the path toward Wrath's Anvil.
- Spawned by killing spiteful fiends and wicked fiends in Malice's Narthex, Repugnance's Rectory, and along the path near Wrath's Anvil.
- Trapped Bellhop is at ( -203, 16, 150 )
- Spawned by gathering the armor pieces from the Hateful Plate, then placing them in a chest unlike the rest at ( -203, 16, 150 ) .
- Vilegore
- To spawn, find a cooled branding iron on a weapon rack ( -161, 16, 137 ) and heat it using the fire pit at ( -105, 10, 237 ) , then right-click a hate mongrel, which causes it to change into Vilegore.
Group 2[]
- Anarchic Obscenity is at The Abbey ( -204, 16, 33 ) .
- Spawned by pulling anarchic lurkers to the middle of the black portal at ( -202, 16, 33 ) and allowing the portal to absorb the lurkers. The lurkers can be found between the Amphitheater of Rancor and The Abbey at ( -128, 17, -35 ) , ( -110, 16, 0 ) , and ( -143, 15, 37 ) .
- Lord of Pain spawns in the Rectory of Confession ( 196, 33, -106 )
- To spawn, kill all the pain bringers and apprentice of pain around the Rectory of Confession to spawn a keeper of pain. Kill the keeper and it will drop one of four keys, (a circle-headed key, a cross-headed key, a square-headed key, or a triangle-headed key. Under the four cages in the area are different shapes: matching the shape to the correct key, then using the key on that cage, will spawn another a keeper of pain. Repeat for all four cages.
- Morg is a carrion golem that spawns in the Rectory of Confession ( 192, 33, -46 )
- To spawn, loot a spite stone from a hate mongrel, then use the stone on the golem ( 192, 33, -46 ) .
- The Damned
- To spawn, find a sacrificial knife ( 174, 33, -75 ) , have your whole group click the knofe and die, then revive in the pit where The Damned is found.
- The Telekinetic Evangelist spawns on the stage in The Abbey.
- Spawned by killing the clerics of hate and acolytes of malice as well as Surrogate of Wrath in The Abbey. Next, look to see the color of the lit-up platform on the stage, then find the statue holding an orb of the same color, and note the direction it's facing. Turn the other two statues to face the same direction.
Group 3[]
- Chief Librarian Py'Tyz on the Mezzanine of House K'Lorn, a balcony above the transporter in the Amphitheater of Rancor.
- After your group has killed two nameds in the zone, as well as Librarian Lin'Dyz, Librarian Ry'Zon, and Librarian Zu'Vod, click the transporter pad in the Amphitheater of Rancor ( 26, 8, -47 ) to access the balcony, then click the Podium of House K'Lorn to spawn the Chief Librarian.
- Gluglug spawns from the fountain in the Amphitheater of Rancor ( -11, 12, -9 )
- Spawned by placing three fishbowls in the fountain, found around the zone. Possible locations include:
- The Abbey ( -262, 19, -1 )
- Basilica of Hate ( -107, 31, -180 )
- Basilica of Hate ( 75, 30, -200 )
- Spawned by placing three fishbowls in the fountain, found around the zone. Possible locations include:
- Helestia spawns at a grave to one side of the Amphitheater of Rancor ( 40, 8, -62 )
- To spawn, click on the grave to release a fettered wraith. Dispel and then kill them, then pick up the chain they drop on the ground and place the chains on the grave. Repeat until she spawns. 4 chains required
- Horb is a carrion golem found walking between the Amphitheater of Rancor and The Abbey around ( -143, 15, 13 ) .
- To spawn, kill Morg and loot a core of spite from its body, then use it by clicking on the roaming golem.
- The Organ Donor spawns beside the organ in the Amphitheater of Rancor. ( -15, 12, -72 )
- To spawn, pick up the Harmonic Conch from inside the fountain ( -12, 14, -15 ) , then use the Conch to get the ability to see music notes for 30 seconds. You'll need to find and click four different colored music notes, noting the colors and the order in which you clicked them. Next, go to the organ and click four colored keys in the same order as the musical notes you found.
Group 4[]
- Igidishi roams along the dirt below the stairs that lead to the Basilica of Hate ( -13, 21, -118 ) .
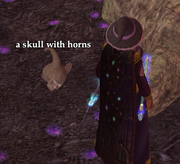
A Skull with Horns
- To spawn, locate and click skulls with horns (tracking works); either they will dissolve or become attackable. Find and kill the skulls until Igidishi spawns. You need a fighter (to see the named when he transforms into an animal) and a scout (to see the totem that matches the named's animal transformation) in your group to kill this name!!!
- Morghorb is west of the stairs at the Basilica of Hate ( 38, 31, -207 )
- After killing Horb, loot a hatebound heart from its body, then click the golem at ( 35, 30, -200 ) to spawn.
- Scorn Baron V'Ayne and Scorn Baroness Ny'Nev
- Click the Icons of Scorn on the wall around the zone until there are no more clicks. Go to ( 212, 33, -61 ) to find white/red orbs or "lanterns". These must all be red to open the door. This part is a puzzle, and you must find a way to align them all.
- The Head of Hate is at the top of the stairs at the Basilica of Hate ( -12, 36, -198 )
- Spawn by killing the Surrogate of Contempt, Surrogate of Rage, Surrogate of Rancor, Surrogate of Venom, and Surrogate of Wrath, then craft on the book/crafting station [need actual name of the dropped item] they drop to destroy "the vessel" (that's how the craft to do is named) and prevent respawning (if you don't do the craft, the Surrogate will respawn).
- Ze'Vlu'Vex appears on the steps of the Basilica of Hate at ( -14, 31, -171 ) .
- Spawned by slaying the loathsome liches on either side of the Basilica of Hate around ( -82, 31, -251 ) and ( 55, 31, -258 ) ; once the liches are dead, turn on Ultravision (a buff from coercers or necromancers, or use Gnomish Shades) then find and click on the unlit torches on the sides of the building.
Group 5[]
- Estir the Spiteful is within the Heart of Hate, which is entered by clicking the doors of the Basilica of Hate.
- Spawned by killing the groups of blood of fury, blood of hatred, blood of malevolence, and blood of vengeance.
- Gruesome Twosome
- Estir the Spiteful, and Laxil'Vas the Torn together within the Heart of Hate, which is entered by clicking the doors of the Basilica of Hate.
- Cantankerous Triumvirate
- Estir the Spiteful, Laxil'Vas the Torn, and Ragash'Ta the Insidious together within the Heart of Hate, which is entered by clicking the doors of the Basilica of Hate.
- Everyone in the group must have the Achievements for the Gruesome Twosome to be able to spawn Ragash'Ta.
Group 6[]
- Ulvaug the Bloodfang, an Epic x2, appears in the Heart of Hate after killing the Cantankerous Triumvirate.
- Spawned by killing the Cantankerous Triumvirate.
Final Reward[]
The final reward for completing this zone is:
Trophy with minor click effect

Credits[]
| EQ2i credits this Community News article| for the overview information in this article. |
| EQ2i credits posts in this thread written by Gninja, Chrol, and Bawkan at the SOE/DBG Forums for some of the information in this article. |