(adding base info) |
(→Rewards: Added note about saving the looted weapons) Tag: sourceedit |
||
| (46 intermediate revisions by 25 users not shown) | |||
| Line 4: | Line 4: | ||
level = Scales| <!-- Level in your Quest Journal. Use 'Scales' if scales with level. --> |
level = Scales| <!-- Level in your Quest Journal. Use 'Scales' if scales with level. --> |
||
diff = Solo| <!-- Solo, Heroic or Epic --> |
diff = Solo| <!-- Solo, Heroic or Epic --> |
||
| − | szone = Frostfell Wonderland| <!-- The zone in which you receive the quest --> |
+ | szone = Frostfell Wonderland Village| <!-- The zone in which you receive the quest --> |
| − | patch = |
+ | patch = Frostfell 2008| <!-- The game release when this quest first appeared --> |
aaexp = | <!-- if not blank, this quest gives Achievement experience --> |
aaexp = | <!-- if not blank, this quest gives Achievement experience --> |
||
prereq = | <!-- The quest you must complete immediately prior to this one, if any. --> |
prereq = | <!-- The quest you must complete immediately prior to this one, if any. --> |
||
| − | start = |
+ | start = Hail {{NPC|Aildiun Mawdrun}} behind the wardrobe inside {{Zone|Frostfell Wonderland Village||public}}| <!-- How to start the quest. Talk to someone? Examine something? --> |
| − | next = | <!-- The quest that immediately follows this one, if any. --> |
+ | next = It's Time to Sleigh the Dragon!| <!-- The quest that immediately follows this one, if any. --> |
displaytl=y| <!-- IF a template exists for this timeline, show it! --> |
displaytl=y| <!-- IF a template exists for this timeline, show it! --> |
||
altname = | <!-- RARE. Use ONLY if PAGENAME does not EXACTLY match the quest name --> |
altname = | <!-- RARE. Use ONLY if PAGENAME does not EXACTLY match the quest name --> |
||
}} |
}} |
||
| + | |||
| + | ==Notes== |
||
| + | *The spots to place the listening devices are marked with small blue sparkles. Placing the listening devices does NOT drop your disguise. If you for some reason lose the disguise and need to use Stealth or Invisibility, placing the listening device WILL drop Stealth or Invisibility. |
||
| + | *Picking up purple glowing question marks in the zone WILL drop the disguise you put on when you entered the zone (you can pick up the same shinies in the other 2 versions of the zone too). |
||
| + | *Movable boards appear in various locations throughout the zone that will allow you to walk or jump shorter distances across wide chasms. If a location seems unreachable, look for a blue, glowing, movable board and place it to make the jump shorter. Use mouse wheel to spin board and keep fat end on rock side. |
||
| + | *Using {{Item|Spring-Loaded Gnomish Stilts}} will let you jump far enough to ignore the need for the movable board in this particular mission. It may cause some odd pet or merc pathing issues though when you jump the long chasms. |
||
==Steps== |
==Steps== |
||
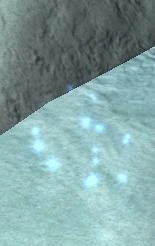
| + | [[Image:Frostfell_Device.jpg|thumb|Device location]] |
||
| − | <!-- EXAMPLE: |
||
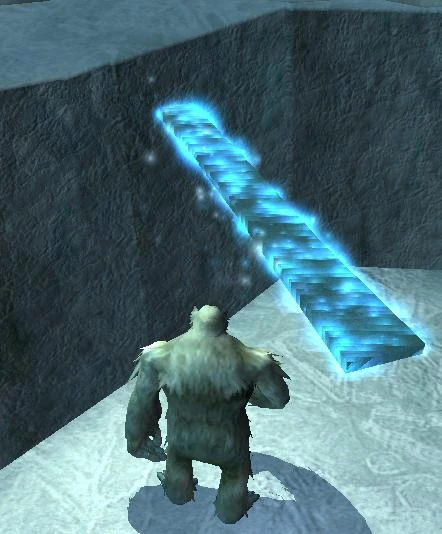
| + | [[Image:Plank_placed.jpg|thumb|Plank placed]] |
||
| − | # First step |
||
| + | # Zone into [[The Icy Keep]] which is the doors directly left of where you enter Frostfell Wonderland Village at Loc {{Loc|103|-4|-1144|uid=39909}}. |
||
| − | # Second step |
||
| + | # On zone entry, harvest and skin the dead yeti laying in the snow immediately to your right as you enter the zone. |
||
| − | #*a note or sub-step that can happen in any order |
||
| + | #*If you kill any of the creatures in the zone it will activate a 30 minute quest success / fail timer. |
||
| − | ##a numbered substep |
||
| + | #*It is still possible to finish the quest within 30 minutes even with the timer active. |
||
| − | END EXAMPLE--> |
||
| + | # Examine (use) the pelt that appears in your inventory. You will now take on the illusion form of a yeti and the pelt disguise in your inventory will disappear. |
||
| − | # {{steps}} |
||
| + | # Follow path to the right to enter the courtyard through a hole in the east wall |
||
| + | # Device Locations in the order you will encounter them: |
||
| + | #* {{Loc|-106|1|-188}} north side of chasm at courtyard entry hole |
||
| + | #* {{Loc|-21|1|-119}} between towers by barricade |
||
| + | #* {{Loc|-10|1|-78}} between towers against south wall |
||
| + | #* {{Loc|90|0|-80}} inside west tower at bottom |
||
| + | #* {{Loc|82|15|-71}} inside west tower at top |
||
| + | # pick up plank at {{Loc|99|0|-88}} to cross chasm to east tower - N.B. it only reaches one way round! |
||
| + | #* {{Loc|-76|1|-109}} inside east tower at bottom |
||
| + | #* {{Loc|17|19|-60}} end of upper walk exiting west from tower |
||
| + | #* {{Loc|-81|27|-104}} roof of east tower in alcove |
||
| + | #* {{Loc|-21|20|-216}} end of west walk along castle wall |
||
| + | #* {{Loc|-166|20|-197}} end of east walk along castle wall |
||
| + | # Return to Aildiun for your reward. |
||
==Rewards== |
==Rewards== |
||
| + | * {{Item|Frozen Token of E'ci}} |
||
| − | <!-- NOTE: Experience is an assumed reward for completing a quest, so please don't list it. |
||
| + | *Choose one of the following - SAVE these weapons for future use in the group version of the zone, as they are ''needed'' as part of the strategy to defeat the many of the "bosses" in that version. |
||
| − | If the quest does NOT give experience, please note it in the rewards (*Gives NO experience). |
||
| + | **Levels 70 - 90: |
||
| − | If the quest gives AA Exp, make sure aaexp=y| appears in the template above! --> |
||
| + | ***[[Ice Axe of Vivid Hues]] |
||
| − | |||
| + | ***[[Two-Handed Ice Axe of Vivid Hues]] |
||
| − | <!-- EXAMPLE: |
||
| + | **Levels 60 - 70: |
||
| − | *At least {{Coin|||||}} |
||
| + | ***[[Ice Axe of Vibrant Hues]] |
||
| − | *{{Faction|name_of_faction_matching_game|+/-amount|Good|Quest}} |
||
| + | ***[[Two-Handed Ice Axe of Vibrant Hues]] |
||
| − | *One of the Following: |
||
| + | **Levels 50 - 60: |
||
| − | **{{Equip|name_of_equipment}} |
||
| + | ***[[Ice Axe of Brilliant Hues]] |
||
| − | **{{Item|name_of_item}} |
||
| + | ***[[Two-Handed Ice Axe of Brilliant Hues]] |
||
| − | END EXAMPLE--> |
||
| + | **Levels 40 - 50: |
||
| − | * {{rewards}} |
||
| + | ***[[Ice Axe of Glowing Hues]] |
||
| + | ***[[Two-Handed Ice Axe of Glowing Hues]] |
||
| + | **Levels 30 - 40: |
||
| + | ***[[Ice Axe of Illuminating Hues]] |
||
| + | ***[[Two-Handed Ice Axe of Illuminating Hues]] |
||
| + | **Levels 20 - 30: |
||
| + | ***[[Ice Axe of Glistening Hues]] |
||
| + | ***[[Two-Handed Ice Axe of Glistening Hues]] |
||
| + | **Levels 10 - 20: |
||
| + | ***[[Ice Axe of Glimmering Hues]] |
||
| + | ***[[Two-Handed Axe of Glimmering Hues]] |
||
| + | **Levels 2 - 10: |
||
| + | ***[[Ice Axe of Sparkling Hues]] |
||
| + | ***[[Two-Handed Ice Axe of Sparkling Hues]] |
||
Latest revision as of 10:45, 13 December 2015
|
| Journal Category | World Event | ||||
| Introduced | Frostfell 2008 | ||||
| Journal Level | Scales with player level | ||||
| Journal Difficulty | Solo | ||||
| Starting Zone | Frostfell Wonderland Village more | ||||
| How to Start | Hail Aildiun Mawdrun behind the wardrobe inside Frostfell Wonderland Village | ||||
| |||||
NOTE:  A discussion page exists which may contain more information A discussion page exists which may contain more information
| |||||
What does this information mean?
Notes[]
- The spots to place the listening devices are marked with small blue sparkles. Placing the listening devices does NOT drop your disguise. If you for some reason lose the disguise and need to use Stealth or Invisibility, placing the listening device WILL drop Stealth or Invisibility.
- Picking up purple glowing question marks in the zone WILL drop the disguise you put on when you entered the zone (you can pick up the same shinies in the other 2 versions of the zone too).
- Movable boards appear in various locations throughout the zone that will allow you to walk or jump shorter distances across wide chasms. If a location seems unreachable, look for a blue, glowing, movable board and place it to make the jump shorter. Use mouse wheel to spin board and keep fat end on rock side.
- Using Spring-Loaded Gnomish Stilts will let you jump far enough to ignore the need for the movable board in this particular mission. It may cause some odd pet or merc pathing issues though when you jump the long chasms.
Steps[]
Device location
Plank placed
- Zone into The Icy Keep which is the doors directly left of where you enter Frostfell Wonderland Village at Loc ( 103, -4, -1144 )
 .
. - On zone entry, harvest and skin the dead yeti laying in the snow immediately to your right as you enter the zone.
- If you kill any of the creatures in the zone it will activate a 30 minute quest success / fail timer.
- It is still possible to finish the quest within 30 minutes even with the timer active.
- Examine (use) the pelt that appears in your inventory. You will now take on the illusion form of a yeti and the pelt disguise in your inventory will disappear.
- Follow path to the right to enter the courtyard through a hole in the east wall
- Device Locations in the order you will encounter them:
- ( -106, 1, -188 ) north side of chasm at courtyard entry hole
- ( -21, 1, -119 ) between towers by barricade
- ( -10, 1, -78 ) between towers against south wall
- ( 90, 0, -80 ) inside west tower at bottom
- ( 82, 15, -71 ) inside west tower at top
- pick up plank at ( 99, 0, -88 ) to cross chasm to east tower - N.B. it only reaches one way round!
- ( -76, 1, -109 ) inside east tower at bottom
- ( 17, 19, -60 ) end of upper walk exiting west from tower
- ( -81, 27, -104 ) roof of east tower in alcove
- ( -21, 20, -216 ) end of west walk along castle wall
- ( -166, 20, -197 ) end of east walk along castle wall
- Return to Aildiun for your reward.
Rewards[]
- Frozen Token of E'ci
- Choose one of the following - SAVE these weapons for future use in the group version of the zone, as they are needed as part of the strategy to defeat the many of the "bosses" in that version.
- Levels 70 - 90:
- Levels 60 - 70:
- Levels 50 - 60:
- Levels 40 - 50:
- Levels 30 - 40:
- Levels 20 - 30:
- Levels 10 - 20:
- Levels 2 - 10: