(New page: {{NamedInformation | iname = | zone = Anchor of Bazzul| patch = | race = Unknown| level = 85| levelmod = ^^^| diff = Heroic| hp = The Executor's Overlook...) |
No edit summary |
||
| (13 intermediate revisions by 7 users not shown) | |||
| Line 2: | Line 2: | ||
iname = | |
iname = | |
||
zone = Anchor of Bazzul| |
zone = Anchor of Bazzul| |
||
| − | patch = | |
+ | patch = The Shadow Odyssey| |
| − | race = |
+ | race = Shadowed Man| |
level = 85| |
level = 85| |
||
levelmod = ^^^| |
levelmod = ^^^| |
||
diff = Heroic| |
diff = Heroic| |
||
| − | hp = |
+ | hp = 1,088,000| <!-- approximate hit points --> |
| − | location = | <!--A textual description of where the monster is, not the /loc coordinates--> |
+ | location = {{POI|The Executor's Overlook}} the last floor of the zone| <!--A textual description of where the monster is, not the /loc coordinates--> |
mapref = | |
mapref = | |
||
uid = | |
uid = | |
||
| − | drops = |
+ | drops = *[[Executor's Wraps]] |
| + | *[[Stone of the Void]] |
||
| + | *[[Zynos' Helm of Voidcalling]] |
||
| + | *[[Clerical Destruction Cloak]] |
||
| + | *[[Nexus-infused Executor's Greaves]] |
||
| + | *[[Voidmetal Enhanced Gauntlets]] |
||
| + | *[[Wrap of the Void]] |
||
| <!-- use [[]]'s to list important known drops (no adepts/masters/rares) --> |
| <!-- use [[]]'s to list important known drops (no adepts/masters/rares) --> |
||
group = | <!-- social grouping that is NOT a faction, if any. Leave blank if no group. --> |
group = | <!-- social grouping that is NOT a faction, if any. Leave blank if no group. --> |
||
| Line 21: | Line 27: | ||
resists = | |
resists = | |
||
rquests = | |
rquests = | |
||
| − | aaxp = | <!-- Yes, or amount of AA Experience --> |
+ | aaxp = Yes| <!-- Yes, or amount of AA Experience --> |
| − | sp = | <!-- Yes, or amount of Status Points --> |
+ | sp = No| <!-- Yes, or amount of Status Points --> |
}} |
}} |
||
==Strategy== |
==Strategy== |
||
<!-- If there is a proven strategy that is effective against this named, describe it here --> |
<!-- If there is a proven strategy that is effective against this named, describe it here --> |
||
| + | Have two people manning the void portals that will spawn to the extreme left and right of the named. They must rotate the portals after they spawn, and run them in to place them at 45 degrees next to the named while your tank holds him. With the named centered on the upper portal, the side portals must be aligned with the name in the center. This will repeat on a regular basis. The more you move the portals, the more void sparks will spawn; you can either kill or ignore them as they do very little dps. |
||
| + | |||
| + | |||
| + | Additional notes: Try not to move the named. There is no need to move the portal behind the named as you enter room. Instead move the portals to left and right of the named to a 45 degree angle near the named, such that the portals (together with the one behind him) form a equal length triangle around him, with him in the center of the triangle. Perfect placement is not required but if the named moves have the tank carefully pull him back in line with the portal by the shard (his original position) the alternative will be for all to run out of the room which will reset the encounter. Portal moving can also be done with one person positioning both portals, he will occasionally reset the left and right portals so just keep moving back by him them when he does - when it is right he will quickly die. |
||
Revision as of 23:52, 3 January 2015
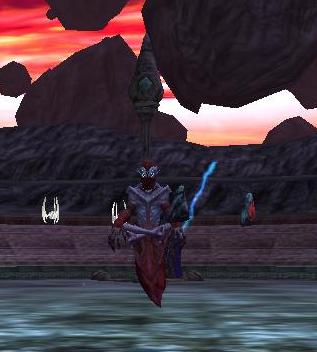 Executor Zynos | ||
|
| Zone (Patch) | Anchor of Bazzul (The Shadow Odyssey) |
| Race | Shadowed Man |
| Level | 85▲▲▲ Tier 9 Heroic , (Approx. HP: 1,088,000) |
| Location | The Executor's Overlook the last floor of the zone |
| Reported Drops | |
| AA Exp | Yes |
| Status Points | none |
What does this information mean?
Strategy
Have two people manning the void portals that will spawn to the extreme left and right of the named. They must rotate the portals after they spawn, and run them in to place them at 45 degrees next to the named while your tank holds him. With the named centered on the upper portal, the side portals must be aligned with the name in the center. This will repeat on a regular basis. The more you move the portals, the more void sparks will spawn; you can either kill or ignore them as they do very little dps.
Additional notes: Try not to move the named. There is no need to move the portal behind the named as you enter room. Instead move the portals to left and right of the named to a 45 degree angle near the named, such that the portals (together with the one behind him) form a equal length triangle around him, with him in the center of the triangle. Perfect placement is not required but if the named moves have the tank carefully pull him back in line with the portal by the shard (his original position) the alternative will be for all to run out of the room which will reset the encounter. Portal moving can also be done with one person positioning both portals, he will occasionally reset the left and right portals so just keep moving back by him them when he does - when it is right he will quickly die.