Reverendpaqo (talk | contribs) (→Steps) |
|||
| (44 intermediate revisions by 27 users not shown) | |||
| Line 1: | Line 1: | ||
{{QuestInformation| |
{{QuestInformation| |
||
| − | timeline = Troubador Epic Weapon| |
+ | timeline = Troubador Epic Weapon| |
| − | jcat = Signature| |
+ | jcat = Signature| |
| + | level = 85| |
||
| − | level = 85| <!-- Level in your Quest Journal. Use 'Scales' if scales with level. --> |
||
| − | diff = Heroic| |
+ | diff = Heroic| |
| − | szone = The Thundering Steppes| |
+ | szone = The Thundering Steppes| |
| − | patch = LU42| |
+ | patch = LU42| |
| + | aaexp = y| |
||
| − | aaexp = y| <!-- if not blank, this quest gives Achievement experience --> |
||
| + | prereq = | |
||
| − | prereq = | <!-- The quest you must complete immediately prior to this one, if any. --> |
||
| − | start = See "Starting the Quest" below| |
+ | start = See "Starting the Quest" below| |
| − | next = Son'Nia's Song| |
+ | next = Son'Nia's Song| |
| + | displaytl=y| |
||
| − | displaytl=y| <!-- IF a template exists for this timeline, show it! --> |
||
| + | altname = | |
||
| − | altname = | <!-- RARE. Use ONLY if PAGENAME does not EXACTLY match the quest name --> |
||
}} |
}} |
||
| Line 25: | Line 25: | ||
==Starting the Quest== |
==Starting the Quest== |
||
| − | #In [[The Thundering Steppes]], Speak with {{NPC|Maestra Orlita}} in the back of the Centaur camp{{loc| |
+ | #In [[The Thundering Steppes]], Speak with {{NPC|Maestra Orlita}} in the back of the Centaur camp{{loc|52|1|1393}} |
| − | #In [[ |
+ | #In [[The City of Freeport|The City of Freeport (East)]], speak with {{NPC|Lyricist Te'naj}} in the Amphitheatre at the top of the hill {{loc|-22|-23|112}} |
| − | #In [[ |
+ | #In [[The City of Freeport|The City of Freeport (East)]], at the {{POI|Conqueror's Flame}}, the island in the middle of the water where the Fences are, and speak with {{NPC|Lyricist Sha'son}} {{Loc|-393.63|-56.95|0.74|uid=56058}}. |
| − | #In [[Qeynos Harbor]], speak with {{NPC|Lyricist |
+ | #In [[Qeynos Province District|Qeynos Province District (Harbor)]], speak with {{NPC|Lyricist Kuehja}}. She stands on the balcony of the third floor of the building directly North of [[Fish's Alehouse and Inn]] {{loc|817|-14|36}} |
| − | #In [[Qeynos Harbor]], |
+ | #In [[Qeynos Province District|Qeynos Province District (Harbor)]], speak with [[Lyricist Trucci]]. She stands north of {{NPC|Lyricist Kuehja}}, across the water behind the round building {{loc|830|-25|-20}}. |
| − | #In [[ |
+ | #In [[Qeynos Capitol District|Qeynos Capitol District (South)]], enter the red portal of the [[South Qeynos Mage Tower|mage tower]]. Click on [[A Chaotic History]] book {{loc|711|42|109}} and read it to be offered the quest. |
| + | |||
| + | Ask the NPC's what the song is about. |
||
==Steps== |
==Steps== |
||
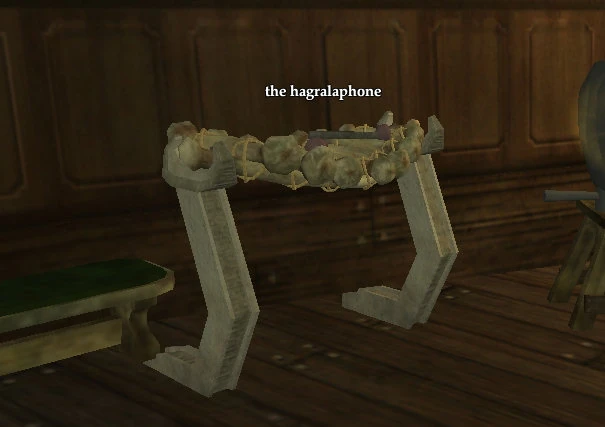
[[Image:The Hagralaphone.jpg|right|thumb|The Hagralaphone]] |
[[Image:The Hagralaphone.jpg|right|thumb|The Hagralaphone]] |
||
#Travel to [[Rivervale]] and enter [[Laughing Trout]] ''(small door amongst the roots of a large tree, {{loc|-487|0|-141}})''. Click [[:Image:The Hagralaphone.jpg|the hagralaphone]] {{Loc|-444|-6|-155}} |
#Travel to [[Rivervale]] and enter [[Laughing Trout]] ''(small door amongst the roots of a large tree, {{loc|-487|0|-141}})''. Click [[:Image:The Hagralaphone.jpg|the hagralaphone]] {{Loc|-444|-6|-155}} |
||
| − | #Travel to [[ |
+ | #Travel to [[Enchanted Lands]] and talk to [[Camfred]] {{Loc|300|0|-293}} |
#Travel to [[Antonica]] and go to [[The Tower of Vhalen]] {{Loc|-1302|38|48}}. Click the bell to summon [[A vision of Vhalen]] and speak with him. |
#Travel to [[Antonica]] and go to [[The Tower of Vhalen]] {{Loc|-1302|38|48}}. Click the bell to summon [[A vision of Vhalen]] and speak with him. |
||
#Travel to [[The Thundering Steppes]] and go to the [[Shrine of Decay]] {{Loc|359|5|1196}}. Speak with The Ghost of Vhalen to receive the {{Item|North Wind of Karana}}. |
#Travel to [[The Thundering Steppes]] and go to the [[Shrine of Decay]] {{Loc|359|5|1196}}. Speak with The Ghost of Vhalen to receive the {{Item|North Wind of Karana}}. |
||
#Travel to [[The Poets Palace]] and speak to [[The Djinn Master]]. |
#Travel to [[The Poets Palace]] and speak to [[The Djinn Master]]. |
||
| − | #* You will need to have completed {{Quest|Be Careful What You Wish For}} for access to Poets Palace, {{Quest|Words of Air}} to speak [[Uruvanian]], and the the 3 ring events ( |
+ | #* You will need to have completed {{Quest|Be Careful What You Wish For}} for access to Poets Palace, {{Quest|Words of Air}} to speak [[Uruvanian]], and the the 3 ring events ( [[Shimmering Citadel : Poets Palace : The First Mirror.|The First Mirror]], [[Shimmering Citadel : Poets Palace : The Second Mirror.|The Second Mirror]], [[Shimmering Citadel : Poets Palace : The Third Mirror.|The Third Mirror]] ) to open 4th Mirror to reach Master Djinn. |
#Still in Poets Palace, rub the lamp {{Item|The Vessel of Music}} {{Loc|-110|295|-57}}. The {{NPC|Ghost of Vhalen}} will appear. Speak to him in order to receive the {{Item|West Wind of Karana}}. |
#Still in Poets Palace, rub the lamp {{Item|The Vessel of Music}} {{Loc|-110|295|-57}}. The {{NPC|Ghost of Vhalen}} will appear. Speak to him in order to receive the {{Item|West Wind of Karana}}. |
||
| − | #Travel to the [[Palace of the Awakened]] and make your way to the sixth floor where [[Skygazer]] resides. Speak to The Ghost of Vhalen (near the harmony bookcase) {{Loc| |
+ | #Travel to the [[Palace of the Awakened]] and make your way to the sixth floor where [[Skygazer]] resides. Speak to The Ghost of Vhalen (near the harmony bookcase) {{Loc|58.97|140.97|24.15|uid=31503}} to receive the {{Item|South Wind of Karana}}. |
| − | #Travel to [[Castle Mistmoore]] |
+ | #Travel to [[Castle Mistmoore]] and make your way to the thaumaturge room at {{Loc|-253|6|-15}}. Click on the Ornate Case 89 to receive the piano key. *NOTE: when you click on the case, you will receive "a small block" which is used to activate the piano in the next step. |
| − | # |
+ | #Go to the {{Zone|Castle Mistmoore}} main entrance. Use the key on the piano in the main room {{Loc|4.53|41|-2.98}} (mouse over the keys until you see a ?, then right-click to place piano key 89) to summon the {{NPC|Ghost of Vhalen}} and receive the {{Item|East Wind of Karana}}. |
#Travel to [[Rivervale]] again and re-enter {{POI|Laughing Trout}}. Click the hagralaphone again {{Loc|-444|-6|-155}}, at which point a 15 min timer begins counting down. |
#Travel to [[Rivervale]] again and re-enter {{POI|Laughing Trout}}. Click the hagralaphone again {{Loc|-444|-6|-155}}, at which point a 15 min timer begins counting down. |
||
| − | #Travel to [[The Tower of the Drafling]] {{Loc|-495|21|41}} and speak to {{NPC|The Hagralazoo}}. When you finish the conversation, she will turn into an |
+ | #Travel to the ramp outside of [[The Tower of the Drafling]] {{Loc|-495|21|41}} and speak to {{NPC|The Hagralazoo}}. When you finish the conversation, she will turn into an 81^^^ mob which you must kill (relatively easy kill). You will then receive an icy gem. |
#* You must speak [[Death's Whisper]] to be able to talk to The Hagralazoo. |
#* You must speak [[Death's Whisper]] to be able to talk to The Hagralazoo. |
||
#Travel to {{Zone|Kylong Plains}} and head toward {{POI|Teren's Grasp}} Click the frozen totem at {{Loc|1759|461|-656}}. |
#Travel to {{Zone|Kylong Plains}} and head toward {{POI|Teren's Grasp}} Click the frozen totem at {{Loc|1759|461|-656}}. |
||
| Line 52: | Line 54: | ||
#* '''IMPORTANT:''' Be sure to select the second option "I seek the Ward of Kelkarn". If you do not, you will be attacked and will have to speak with {{NPC|Zyn'Phro}} again to continue. You will have to hail him in order to get him to speak again. |
#* '''IMPORTANT:''' Be sure to select the second option "I seek the Ward of Kelkarn". If you do not, you will be attacked and will have to speak with {{NPC|Zyn'Phro}} again to continue. You will have to hail him in order to get him to speak again. |
||
#Travel to the {{POI|Gwalnax Brigade Tower}} in {{Zone|Kylong Plains}} and talk to {{NPC|Historian Holdak}} {{Loc|1496|165|-2924}}. |
#Travel to the {{POI|Gwalnax Brigade Tower}} in {{Zone|Kylong Plains}} and talk to {{NPC|Historian Holdak}} {{Loc|1496|165|-2924}}. |
||
| + | #Travel to {{POI|Chardok}} and collect the artifacts below. |
||
| − | #Travel to {{POI|Chardok}} and collect the artifacts below. If you are patient and careful, it is possible to obtain the updates solo by sneaking around with [[Stealth]]. *whomever edited this needed to add, "you can solo this, IF you have the keys already." and should have added that sneaking The Runes of Gor is HIGHLY improbable that you will actually succeed even if you use one of the sleeping potions on the entire barracks. You definately should take a group for that particular update.* |
||
#*{{Item|The Flame of Shazzuk}} at the center of the wind chamber {{Loc|32|-23|-458}} |
#*{{Item|The Flame of Shazzuk}} at the center of the wind chamber {{Loc|32|-23|-458}} |
||
| − | #*{{Item|The Statue of Thi'zok}} in |
+ | #*{{Item|The Statue of Thi'zok}} in Bathezid green cristal gatekeeper room {{Loc|-352|-18|-541}}) |
#*{{Item|The Eye of Gorowyn}} on 2nd floor of the island near the second sokokar post. Take the Spiral stairs down to {{Loc|-391|-103|-2}} |
#*{{Item|The Eye of Gorowyn}} on 2nd floor of the island near the second sokokar post. Take the Spiral stairs down to {{Loc|-391|-103|-2}} |
||
#*{{Item|Blood of the Betrayer}} inside {{Instance|Court of Korucust}}, a bowl near the pit in the room to the right from the main hall {{Loc|-933|-69|298}} |
#*{{Item|Blood of the Betrayer}} inside {{Instance|Court of Korucust}}, a bowl near the pit in the room to the right from the main hall {{Loc|-933|-69|298}} |
||
#** This can be soloed by running into the room and clicking the bowl quickly before the social finishes and the mobs become aggro. |
#** This can be soloed by running into the room and clicking the bowl quickly before the social finishes and the mobs become aggro. |
||
#*{{Item|The Box of Tortured Delights}} inside {{Instance|Court of Korucust}}, the red cube inside the cage {{Loc|-982|29|77}} |
#*{{Item|The Box of Tortured Delights}} inside {{Instance|Court of Korucust}}, the red cube inside the cage {{Loc|-982|29|77}} |
||
| − | #** You need to attack {{Monster|a cenobite warden}} to get teleported to Jail. |
+ | #** You need to attack {{Monster|a cenobite warden}} to get teleported to Jail. |
| + | #** '''IMPORTANT:''' If you are L90 and oneshot the cenobite warden on the pull then you will have to wait for the zone to reset before trying again. I suggest pulling with a debuff to circumvent this issue. |
||
| − | #*{{Item|Hand of the Metal God}} in the corner of the room with {{Named| |
+ | #*{{Item|Hand of the Metal God}} in the corner of the room with {{Named|Gaodon}} {{Loc|-34|-54|40}} back outside in Chardok. |
#*{{Item|The Runes of Gor}} inside the barracks, down by the edge of the water, next to {{Monster|a Caroeth gatekeeper}} {{Loc|205|-75|95}}. ''If sneaking you can stand at {{Loc|212|-75|103}} in the water and click on the {{Item|The Runes of Gor}} then evac or CoH out of the zone.'' |
#*{{Item|The Runes of Gor}} inside the barracks, down by the edge of the water, next to {{Monster|a Caroeth gatekeeper}} {{Loc|205|-75|95}}. ''If sneaking you can stand at {{Loc|212|-75|103}} in the water and click on the {{Item|The Runes of Gor}} then evac or CoH out of the zone.'' |
||
#Return to [[Historian Holdak]] with the artifacts. You will receive [[The Wards of Kelkarn]]. |
#Return to [[Historian Holdak]] with the artifacts. You will receive [[The Wards of Kelkarn]]. |
||
#Play the [[The Wards of Kelkarn]] to protect yourself from the Ayonic curse. |
#Play the [[The Wards of Kelkarn]] to protect yourself from the Ayonic curse. |
||
| − | #Travel to [[City of Mist]] and click on the mandolin at {{Loc|-227|148|-950}}. Speak to the Ghost of Vhalen. |
+ | #Travel to [[City of Mist]] and click on the mandolin (it's in a box in the corner) at {{Loc|-227|148|-950}}. Speak to the Ghost of Vhalen. |
| − | # |
+ | #Travel to [[Jarsath Wastes]] and click The Yore Flame {{loc|-2430|92|1690|uid=34016}}. Either jump, take the ramp that takes you beneath the platform at the [[Temple of the White Lady]] or fly down if you have a flying mount. This will begin the side quest {{Quest|Feeding the Flame of Yore}}. |
| − | ##Harvest 10 {{Item|xegonite cluster}}s. |
+ | ##Harvest 10 {{Item|xegonite cluster}}s. As of GU56, you no longer have to harvest the clusters; you can acquire them through trades or the broker if you wish. |
| − | ##Return to |
+ | ##Return to The Yore Flame {{loc|-2430|92|1690|uid=34016}}, and click it to summon {{NPC|Shade of Modeus}}. Your 10 Xegonite clusters will be consumed during this step. |
#Speak with {{NPC|Shade of Modeus}}. |
#Speak with {{NPC|Shade of Modeus}}. |
||
#Kill the following: |
#Kill the following: |
||
| Line 79: | Line 82: | ||
#*The instruments will respawn after a few minutes if you have trouble finding all four of them. |
#*The instruments will respawn after a few minutes if you have trouble finding all four of them. |
||
#*You will be rewarded the [[Ayonic Axe]] and [[The Wards of Kelkarn]], a house item. You need to place The Wards of Kelkarn in your character's home, and play them to begin the mythical version of the epic. |
#*You will be rewarded the [[Ayonic Axe]] and [[The Wards of Kelkarn]], a house item. You need to place The Wards of Kelkarn in your character's home, and play them to begin the mythical version of the epic. |
||
| + | |||
| + | STOP! |
||
| + | If your goal is to have the Item for the [[Epic Conversion Timeline]], you do NOT need to do the RAID version. You can begin that timeline now. |
||
==Rewards== |
==Rewards== |
||
| Line 84: | Line 90: | ||
==Credits== |
==Credits== |
||
| − | |||
{{SOEforums|http://forums.station.sony.com/eq2/posts/list.m?topic_id=406244}} |
{{SOEforums|http://forums.station.sony.com/eq2/posts/list.m?topic_id=406244}} |
||
{{EQ2flames|http://www.eq2flames.com/troubadors/19600-epic-quest-help-2.html}} |
{{EQ2flames|http://www.eq2flames.com/troubadors/19600-epic-quest-help-2.html}} |
||
| + | |||
| + | |||
| + | {{EpicWeapQuestBottom| |
||
| + | Class=Troubador}} |
||
Revision as of 05:24, 14 February 2019
|
| Journal Category | Signature (AA) | ||||
| Introduced | LU42 | ||||
| Journal Level | 85 (Tier 9) | ||||
| Journal Difficulty | Heroic | ||||
| Starting Zone | The Thundering Steppes more | ||||
| How to Start | See "Starting the Quest" below | ||||
| |||||
NOTE:  A discussion page exists which may contain more information A discussion page exists which may contain more information
| |||||
What does this information mean?
Requirements
- You must be a level 80 Troubador.
- Ability to speak and understand the following languages:
- Access to The Poets Palace
- Access to Court of Korucust
Starting the Quest
- In The Thundering Steppes, Speak with Maestra Orlita in the back of the Centaur camp( 52, 1, 1393 )
- In The City of Freeport (East), speak with Lyricist Te'naj in the Amphitheatre at the top of the hill ( -22, -23, 112 )
- In The City of Freeport (East), at the Conqueror's Flame, the island in the middle of the water where the Fences are, and speak with Lyricist Sha'son ( -394, -57, 1 )
 .
. - In Qeynos Province District (Harbor), speak with Lyricist Kuehja. She stands on the balcony of the third floor of the building directly North of Fish's Alehouse and Inn ( 817, -14, 36 )
- In Qeynos Province District (Harbor), speak with Lyricist Trucci. She stands north of Lyricist Kuehja, across the water behind the round building ( 830, -25, -20 ) .
- In Qeynos Capitol District (South), enter the red portal of the mage tower. Click on A Chaotic History book ( 711, 42, 109 ) and read it to be offered the quest.
Ask the NPC's what the song is about.
Steps
The Hagralaphone
- Travel to Rivervale and enter Laughing Trout (small door amongst the roots of a large tree, ( -487, 0, -141 ) ). Click the hagralaphone ( -444, -6, -155 )
- Travel to Enchanted Lands and talk to Camfred ( 300, 0, -293 )
- Travel to Antonica and go to The Tower of Vhalen ( -1302, 38, 48 ) . Click the bell to summon A vision of Vhalen and speak with him.
- Travel to The Thundering Steppes and go to the Shrine of Decay ( 359, 5, 1196 ) . Speak with The Ghost of Vhalen to receive the North Wind of Karana.
- Travel to The Poets Palace and speak to The Djinn Master.
- You will need to have completed Be Careful What You Wish For for access to Poets Palace, Words of Air to speak Uruvanian, and the the 3 ring events ( The First Mirror, The Second Mirror, The Third Mirror ) to open 4th Mirror to reach Master Djinn.
- Still in Poets Palace, rub the lamp The Vessel of Music ( -110, 295, -57 ) . The Ghost of Vhalen will appear. Speak to him in order to receive the West Wind of Karana.
- Travel to the Palace of the Awakened and make your way to the sixth floor where Skygazer resides. Speak to The Ghost of Vhalen (near the harmony bookcase) ( 59, 141, 24 ) to receive the South Wind of Karana.
- Travel to Castle Mistmoore and make your way to the thaumaturge room at ( -253, 6, -15 ) . Click on the Ornate Case 89 to receive the piano key. *NOTE: when you click on the case, you will receive "a small block" which is used to activate the piano in the next step.
- Go to the Castle Mistmoore main entrance. Use the key on the piano in the main room ( 5, 41, -3 ) (mouse over the keys until you see a ?, then right-click to place piano key 89) to summon the Ghost of Vhalen and receive the East Wind of Karana.
- Travel to Rivervale again and re-enter Laughing Trout. Click the hagralaphone again ( -444, -6, -155 ) , at which point a 15 min timer begins counting down.
- Travel to the ramp outside of The Tower of the Drafling ( -495, 21, 41 ) and speak to The Hagralazoo. When you finish the conversation, she will turn into an 81^^^ mob which you must kill (relatively easy kill). You will then receive an icy gem.
- You must speak Death's Whisper to be able to talk to The Hagralazoo.
- Travel to Kylong Plains and head toward Teren's Grasp Click the frozen totem at ( 1759, 461, -656 ) .
- Speak with Zyn'Phro ( 1757, 463, -647 ) nearby to update the quest.
- Travel to the Gwalnax Brigade Tower in Kylong Plains and talk to Historian Holdak ( 1496, 165, -2924 ) .
- Travel to Chardok and collect the artifacts below.
- The Flame of Shazzuk at the center of the wind chamber ( 32, -23, -458 )
- The Statue of Thi'zok in Bathezid green cristal gatekeeper room ( -352, -18, -541 ) )
- The Eye of Gorowyn on 2nd floor of the island near the second sokokar post. Take the Spiral stairs down to ( -391, -103, -2 )
- Blood of the Betrayer inside Court of Korucust, a bowl near the pit in the room to the right from the main hall ( -933, -69, 298 )
- This can be soloed by running into the room and clicking the bowl quickly before the social finishes and the mobs become aggro.
- The Box of Tortured Delights inside Court of Korucust, the red cube inside the cage ( -982, 29, 77 )
- You need to attack a cenobite warden to get teleported to Jail.
- IMPORTANT: If you are L90 and oneshot the cenobite warden on the pull then you will have to wait for the zone to reset before trying again. I suggest pulling with a debuff to circumvent this issue.
- Hand of the Metal God in the corner of the room with Gaodon ( -34, -54, 40 ) back outside in Chardok.
- The Runes of Gor inside the barracks, down by the edge of the water, next to a Caroeth gatekeeper ( 205, -75, 95 ) . If sneaking you can stand at ( 212, -75, 103 ) in the water and click on the The Runes of Gor then evac or CoH out of the zone.
- Return to Historian Holdak with the artifacts. You will receive The Wards of Kelkarn.
- Play the The Wards of Kelkarn to protect yourself from the Ayonic curse.
- Travel to City of Mist and click on the mandolin (it's in a box in the corner) at ( -227, 148, -950 ) . Speak to the Ghost of Vhalen.
- Travel to Jarsath Wastes and click The Yore Flame ( -2430, 92, 1690 )
 . Either jump, take the ramp that takes you beneath the platform at the Temple of the White Lady or fly down if you have a flying mount. This will begin the side quest Feeding the Flame of Yore.
- Harvest 10 xegonite clusters. As of GU56, you no longer have to harvest the clusters; you can acquire them through trades or the broker if you wish.
- Return to The Yore Flame ( -2430, 92, 1690 ) , and click it to summon Shade of Modeus. Your 10 Xegonite clusters will be consumed during this step.
- Speak with Shade of Modeus.
- Kill the following:
- Sebilis: High Ambassador Guralz (or his placeholder) in the Audience Chamber ( 99, 2, 412 ) .
- Sebilis: Praetorian Captain Nagol (or his placeholder) near Venril Sathir's Lair ( -8, -129, 476 ) .
- The Crypt of Agony: Fallen Emperor Vekin
- Kill Drusella Sathir in Charasis: Maiden's Chamber.
- Click the 4 musical instruments in the corners of Drusella's Chamber.
- When you click on the first one, a meliva mistress, will spawn and run around saying "You shall not have the harp!" She will become agro (82^^^ Heroic) and attack when you click on the 3rd or 4th instrument. (She may or not become aggro before you are awarded your epic)
- FYI: I did not have 4 instruments appear. After clicking on 2 I was rewarded and the quest was finished. Melvia never became aggro'd.
- The instruments will respawn after a few minutes if you have trouble finding all four of them.
- You will be rewarded the Ayonic Axe and The Wards of Kelkarn, a house item. You need to place The Wards of Kelkarn in your character's home, and play them to begin the mythical version of the epic.
STOP! If your goal is to have the Item for the Epic Conversion Timeline, you do NOT need to do the RAID version. You can begin that timeline now.
Rewards
Credits
| EQ2i credits the SOE/DBG Forums for some of the information in this article. |
| The authors wish to credit EQ2 Flames for some of the information in this article. The website went offline around 2017-2018. |
|
This quest is part of the Troubador Epic Weapon Timeline, and can only be started/completed by a member of that class of at least Level 80. |