No edit summary |
(Corrected incorrect information) |
||
| (36 intermediate revisions by 14 users not shown) | |||
| Line 9: | Line 9: | ||
aaexp = y| <!-- if not blank, this quest gives Alt Advancement experience --> |
aaexp = y| <!-- if not blank, this quest gives Alt Advancement experience --> |
||
prereq = | <!-- The quest you must complete immediately prior to this one, if any. --> |
prereq = | <!-- The quest you must complete immediately prior to this one, if any. --> |
||
| − | start = Receive mail from [[Druzzil Ro]] |
+ | start = Receive mail from [[Druzzil Ro]], then speak to her in [[Plane of Magic]] at {{loc|-765|344|1093}}.| <!-- How to start the quest. Talk to someone? Examine something? --> |
next = A Stitch in Time, Part II: Lightning Strikes| <!-- The quest that immediately follows this one, if any. --> |
next = A Stitch in Time, Part II: Lightning Strikes| <!-- The quest that immediately follows this one, if any. --> |
||
displaytl=y| <!-- IF a template exists for this timeline, show it! --> |
displaytl=y| <!-- IF a template exists for this timeline, show it! --> |
||
| Line 17: | Line 17: | ||
==Notes== |
==Notes== |
||
[[File:Meldrath_time_machine.jpg|thumb]] |
[[File:Meldrath_time_machine.jpg|thumb]] |
||
| − | *The combines for this timeline are VERY long, without potions they are taking 3-5 minutes EACH. Plan accordingly and take some 'Progress Potion' or 'Potion of Innovation'. |
+ | *The combines for this timeline are VERY long, without potions they are taking 3-5 minutes EACH. Plan accordingly and take some 'Progress Potion' or 'Potion of Innovation'. If you "twist" the reaction arts during the combine, you can gain a lot of extra progress to make the combine faster at the cost of mana. |
| + | |||
| − | *You may also try to pick-up the "Chassis" and "Circuitry" needed later on in the quest when in those areas. |
||
*Summary: First you're making EMDs to drain bots of power so you can get by them. Then you enter the Lab (Where Gears in the Machine ends) and ultimately the goal is to get to the central lab and get the plans. However, the central lab is locked by a combination stored in the disabled bots lying around. You meet Meldrath's ghost in the control room, and must fix the Hackbot so it can read the status of the other bots, which gives you the combination to the center room. As you go, you drain dangerous bots of power, and vent steam before entering certain hallways. After all 6 binary bots are found, return to control room, enter combination, go to the central lab, disable the 5 pillars with EMDs, pick up the plans, exit the zone. Talk to NPCs, done. |
*Summary: First you're making EMDs to drain bots of power so you can get by them. Then you enter the Lab (Where Gears in the Machine ends) and ultimately the goal is to get to the central lab and get the plans. However, the central lab is locked by a combination stored in the disabled bots lying around. You meet Meldrath's ghost in the control room, and must fix the Hackbot so it can read the status of the other bots, which gives you the combination to the center room. As you go, you drain dangerous bots of power, and vent steam before entering certain hallways. After all 6 binary bots are found, return to control room, enter combination, go to the central lab, disable the 5 pillars with EMDs, pick up the plans, exit the zone. Talk to NPCs, done. |
||
| Line 39: | Line 39: | ||
* 50 [[deadly mushroom]] |
* 50 [[deadly mushroom]] |
||
* 200 [[etherium]] |
* 200 [[etherium]] |
||
| − | * |
+ | * 150 [[gnarled entwood]] |
* 250 [[golden ember]] |
* 250 [[golden ember]] |
||
* 50 [[nightmare cichlid]] |
* 50 [[nightmare cichlid]] |
||
| Line 65: | Line 65: | ||
# Speak to [[Meldrath the Marvelous]] at {{loc|-76|-8|95}}. |
# Speak to [[Meldrath the Marvelous]] at {{loc|-76|-8|95}}. |
||
# Harvest the following: (The nodes can be tracked with Track Harvestable but you don't really need it as they can be easily seen on and around all of the big piles of junk. They also respawn quickly. Reminder: the flying bots are not aggro. The standing ones are.) |
# Harvest the following: (The nodes can be tracked with Track Harvestable but you don't really need it as they can be easily seen on and around all of the big piles of junk. They also respawn quickly. Reminder: the flying bots are not aggro. The standing ones are.) |
||
| − | #* 10 coiled springs |
+ | #* 10 coiled springs [[File:Coiled_springs.jpg|thumb|coiled springs]] |
| − | #* 10 length of conductive wire |
+ | #* 10 length of conductive wire [[File:Conductive_wire.jpg|thumb|conductive wire]] |
| − | #* 10 power nodes |
+ | #* 10 power nodes [[File:Power_node.jpg|thumb|power node]] |
| − | # Craft an [[Electric Manaetic Device (EMD)]] on an [[innovative workstation]] at {{loc|-114|6|-156}} or {{loc|240|3|-165}}. |
+ | # Craft an [[Electric Manaetic Device (EMD)]] on an [[innovative workstation]] at {{loc|-114|6|-156}} or {{loc|240|3|-165}}. [[File:An_innovative_workstation.jpg|thumb|an innovative workstation]] |
| + | # These will drain power when placed near robots and disable them. They will also drain '''your''' power and can be destroyed when they are no longer useful. |
||
#* Each combine (which taken to Pristine yields 10 EMDs) requires: |
#* Each combine (which taken to Pristine yields 10 EMDs) requires: |
||
#** 10 [[storm stalk]] |
#** 10 [[storm stalk]] |
||
| − | #** 10 coiled spring |
+ | #** 10 coiled spring |
#** 10 length of conductive wire, |
#** 10 length of conductive wire, |
||
#** 10 power node |
#** 10 power node |
||
#** 50 [[Celestial Coal]] |
#** 50 [[Celestial Coal]] |
||
| + | #***Recommendation: harvest 30ea. so you can have 30 EMDs on your person, and just zap all of the ''unavoidable'' Clockworks that get in your way! (Note: save 5ea. for last room) |
||
| − | #***There are 3 places where you "need" to use em (1) at the small crossing in the middle top right hallway, (1) in the top left hallway and (1) in the top right Hall way. |
+ | #***There are 3 places where you "need" to use em (1) at the small crossing in the middle top right hallway, (1) in the top left hallway and (1) in the top right Hall way. |
# Speak to [[Meldrath the Marvelous]] at {{loc|23|21|-285}}. |
# Speak to [[Meldrath the Marvelous]] at {{loc|23|21|-285}}. |
||
#* The door at {{loc|71|4|-89}} or {{loc|10|4|-122}} will get you to the back room. |
#* The door at {{loc|71|4|-89}} or {{loc|10|4|-122}} will get you to the back room. |
||
#* Use caution, you may need to wait for mobs to path out of the way to proceed. The mobs aggro ranges are fairly small. |
#* Use caution, you may need to wait for mobs to path out of the way to proceed. The mobs aggro ranges are fairly small. |
||
# Proceed through the door that opens behind [[Meldrath the Marvelous]] and head to his new location at {{loc|30|3|-564}}. |
# Proceed through the door that opens behind [[Meldrath the Marvelous]] and head to his new location at {{loc|30|3|-564}}. |
||
| − | #* There are two levers at the end of the hallway at {{loc|25|7|-354}}. |
+ | #* There are two levers at the end of the hallway at {{loc|25|7|-354}}. [[File:Purge_Levers.jpg|thumb|West & East Purge Levers - Pulling this lever will purge any built up steam in the western/eastern corridor rendering the vents inert for 30 seconds.]] |
| + | #*The levers are used to (temporarily) deactivate the steam vents in the east and west halls. After pulling a lever, wait for the red circles and bubbles to dissipate before proceeding down that hall. Watch your chat window for updates on the safety of hallways. If you know the [[Tik-Tok]] language, the levers tell you they will reset in 30 sec. |
||
#** There are matching levers at {{loc|93|7|-343}} and {{loc|-43|8|-342}} to pull when going into the hallways from the opposite directions. |
#** There are matching levers at {{loc|93|7|-343}} and {{loc|-43|8|-342}} to pull when going into the hallways from the opposite directions. |
||
#* Use EMDs to deactivate mobs you cannot avoid. You will need to place the EMD and have the mob walk near it. The range on the EMD is about 10m. Multiple robots can be affected by a single EMD. Be sure to save 5 EMDs for the final quest step. |
#* Use EMDs to deactivate mobs you cannot avoid. You will need to place the EMD and have the mob walk near it. The range on the EMD is about 10m. Multiple robots can be affected by a single EMD. Be sure to save 5 EMDs for the final quest step. |
||
| Line 86: | Line 89: | ||
# Speak to [[Meldrath the Marvelous]] at {{loc|30|3|-564}}. |
# Speak to [[Meldrath the Marvelous]] at {{loc|30|3|-564}}. |
||
#*''Note: This step gives tradeskill XP'' |
#*''Note: This step gives tradeskill XP'' |
||
| − | # Collect |
+ | # Collect the following: |
#* ''Note: your quest journal does not tell you that you have to collect these 3 items before you can craft. If you get a message 'can't craft while in combat, use Esc, /yell, FD or Evac.'' |
#* ''Note: your quest journal does not tell you that you have to collect these 3 items before you can craft. If you get a message 'can't craft while in combat, use Esc, /yell, FD or Evac.'' |
||
| − | #* Find the |
+ | #* Find & ''carry'' the [[Chassis shell]] at {{loc|-62.97|-3|-460}} to craft the Chassis for the Hackbot 3000. |
| + | #* WARNING! Epic x4 Clockwork on other side of door near this /loc. Do NOT open door, place EMD at door, wait few seconds after activation, then proceed to item which is just inside room. |
||
#** This combine requires: |
#** This combine requires: |
||
| − | #*** 1 chassis shell |
+ | #*** 1 chassis shell[[File:Chassis_shell.jpg|thumb|chassis shell]] |
#*** 50 [[golden ember]] |
#*** 50 [[golden ember]] |
||
#*** 50 [[gnarled entwood]] |
#*** 50 [[gnarled entwood]] |
||
#*** 50 [[plumewit hide]] |
#*** 50 [[plumewit hide]] |
||
#*** 25 [[Celestial Coal]]. |
#*** 25 [[Celestial Coal]]. |
||
| − | #* Find |
+ | #* Find and ''carry'' the [[Shorted circuitry]] at {{loc|106|-6|-424}} to craft the Circuitry for the Hackbot 3000.[[File:Shorted_circuitry.jpg|thumb|shorted circuitry]] |
| + | #* WARNING! Epic x4 Clockwork on other side of door near this /loc. Do NOT open door, place EMD at door, wait few seconds after activation, then proceed to item which is just inside room. |
||
#** This combine requires: |
#** This combine requires: |
||
#*** 1 shorted circuitry |
#*** 1 shorted circuitry |
||
| Line 102: | Line 107: | ||
#*** 50 [[plumewit hide]] |
#*** 50 [[plumewit hide]] |
||
#*** 25 [[Celestial Filament]]. |
#*** 25 [[Celestial Filament]]. |
||
| − | #* Find the |
+ | #* Find the [[Misshapen gears]] at {{loc|150|4|-424}} to craft the Gears for the Hackbot 3000 and craft '''all three''' of the items on an [[innovative workstation]] which can be found near {{loc|160|4|-424}} next to the [[Misshapen gears]] you just picked up. [[File:Misshapen_gears.jpg|thumb|misshapen gears]] [[File:Innovative_workstation.jpg|thumb|an innovative workstation]] |
#** This combine requires: |
#** This combine requires: |
||
#*** 1 misshapen gears |
#*** 1 misshapen gears |
||
| Line 108: | Line 113: | ||
#*** 50 [[etherium]] |
#*** 50 [[etherium]] |
||
#*** 50 [[gnarled entwood]] |
#*** 50 [[gnarled entwood]] |
||
| − | #*** 25 [[Celestial Coal]] |
+ | #*** 25 [[Celestial Coal]] |
| − | # Return to {{loc|18|3|-565}} and install the crafted components on [[Hackbot 3000]] |
+ | # Return to {{loc|18|3|-565}} and right-click to install the crafted components on [[Hackbot 3000]]. |
| − | # Summon Hackbot 3000; The |
+ | # Summon Hackbot 3000; The Ability is in your knowledge book Abilities. |
| − | # Now that Hackbot 3000 is following you, when you approach a Binary Control Bot (looks like a disabled robot sitting on the floor), the robot will declare its status as true or false. Make a note of the bot's number and status (such as II/T). |
+ | # Now that Hackbot 3000 is following you, when you approach a Binary Control Bot (looks like a disabled robot sitting on the floor), the robot will declare its status as true or false. Make a note of the bot's number and status (such as II/T). [[File:Binary_Control_Bot.jpg|thumb|Binary Control Bot]] |
#* ''Note: Roman numerals, XXXII (32), XVI (16), VIII (8), IV (4), II (2), I (1)'' |
#* ''Note: Roman numerals, XXXII (32), XVI (16), VIII (8), IV (4), II (2), I (1)'' |
||
#*If you right-click the Hackbot 3000 and select 'Check Status" it will report the True/False responses for each bot |
#*If you right-click the Hackbot 3000 and select 'Check Status" it will report the True/False responses for each bot |
||
#*Don't forget to turn off the steam pipes each time go up and down these halls. They don't stay off for very long. |
#*Don't forget to turn off the steam pipes each time go up and down these halls. They don't stay off for very long. |
||
| + | #** The suggested order is First, Fifth, Sixth, Third, Fourth, Second to avoid back tracking. |
||
| − | #* First: {{loc|-48|-7|-490}} |
||
| − | #* |
+ | #* '''First''' (Binary Control Bot XXXII): {{loc|-48|-7|-490}} |
| − | #* |
+ | #* '''Second''' (Binary Control Bot XVI) : {{loc|85|-7|-463}} |
| − | #* |
+ | #* '''Third''' (Binary Control Bot VIII) : {{loc|127|-3|-361}} |
| − | #* |
+ | #* '''Fourth''' (Binary Control Bot IV) : {{loc|189|-3|-495}} |
| + | #* '''Fifth''' (Binary Control Bot II) : {{loc|-92|4|-444}} (climb the boxes to get to this one) |
||
| − | #* Sixth: {{loc|-132|-3|-513}} |
+ | #* '''Sixth''' (Binary Control Bot I) : {{loc|-132|-3|-513}} |
# Return to {{loc|18|3|-565}}. (The control room with Meldrath's ghost.) |
# Return to {{loc|18|3|-565}}. (The control room with Meldrath's ghost.) |
||
##Right-click and examine the geared wheels on the control consoles |
##Right-click and examine the geared wheels on the control consoles |
||
| − | ##for each terminal, if the bot with the same number said "true" then turn clockwise, otherwise, leave it alone. |
+ | ##for each terminal, if the bot with the same number said "true" then turn clockwise, otherwise, leave it alone. ''NOTE: You can right-click on the hackbot to recheck the true/false responses.'' |
#* When they are correct: 'You hear a rubbing against metal, as a door opens in the distance!' |
#* When they are correct: 'You hear a rubbing against metal, as a door opens in the distance!' |
||
| − | #* XXXII - 32: {{loc| |
+ | #* Terminal XXXII - 32: {{loc|5|3|-548}} |
| − | #* XVI - 16: {{loc| |
+ | #* Terminal XVI - 16: {{loc|10|3|-548}} |
| − | #* VIII - 8: {{loc| |
+ | #* Terminal VIII - 8: {{loc|15|3|-548}} |
| − | #* IV - 4: {{loc| |
+ | #* Terminal IV - 4: {{loc|34|3|-548}} |
| − | #* II - 2: {{loc| |
+ | #* Terminal II - 2: {{loc|39|3|-548}} |
| − | #* I - 1: {{loc| |
+ | #* Terminal I - 1: {{loc|44|3|-548}} |
| + | |||
| − | #** ''NOTE: You can right-click on the hackbot to recheck the true/false responses.'' |
||
# Exit the control room and go to {{loc|24|-7|-466}}. |
# Exit the control room and go to {{loc|24|-7|-466}}. |
||
| − | # Place an EMD on the gold spot in front of each of the 5 pillars. Do NOT enter the red force field. |
+ | # Place an EMD on the gold spot in front of each of the 5 pillars. Do NOT enter the red force field.[[File:EMD_placement_point.jpg|thumb|EMD placement point]] |
#* {{loc|24|-7|-456}} |
#* {{loc|24|-7|-456}} |
||
#* {{loc|63|-7|-446}} |
#* {{loc|63|-7|-446}} |
||
| Line 140: | Line 146: | ||
#* {{loc|-16|-7|-397}} |
#* {{loc|-16|-7|-397}} |
||
#** Each one you place will give the message 'The EMD has disabled one of the defenses in the main room. There are # left to disable' |
#** Each one you place will give the message 'The EMD has disabled one of the defenses in the main room. There are # left to disable' |
||
| − | # Collect Meldrath the Malignant's Contraption Schematics at {{loc|20|-5|-377}}. |
+ | # Collect Meldrath the Malignant's Contraption Schematics at {{loc|20|-5|-377}}. [[File:Meldrath_the_Malignant's_Contraption_Schematics.jpg|thumb|Meldrath the Malignant's Contraption Schematics]] |
| − | # Return to |
+ | # Return to {{NPC|Druzzil Ro}} {{loc|-5|6|3}} in the [[Coliseum of Valor]] using the portal IN the room at {{loc|24|-7|-411}}. |
| + | #*''Note: The following step gives tradeskill XP'' |
||
| − | # Speak to |
+ | # Speak to {{NPC|Varig Ro}} (a roamer in this zone) in the [[Coliseum of Valor]]. He wanders the outer ring. Look for the book on your map. |
==Rewards== |
==Rewards== |
||
| Line 153: | Line 160: | ||
==Credits== |
==Credits== |
||
If this article includes any work that originated on another website, please give credit where due! DO NOT USE THIS SECTION TO PUT IN A PERSONAL NAME. The history page for this article tells us about who edited it. Use this section specifically to credit other websites or posts in the SOE forums. --> |
If this article includes any work that originated on another website, please give credit where due! DO NOT USE THIS SECTION TO PUT IN A PERSONAL NAME. The history page for this article tells us about who edited it. Use this section specifically to credit other websites or posts in the SOE forums. --> |
||
| + | |||
| + | Note: If you do this quest with double exp and full vit and a exp potion %100 on you will get over four levels, so level 100 to 104 and a bit at the mid-point. If you use Adept Hands just before you turn in the rods to Varig Ro, you ''might'' reach level 110. |
||
Revision as of 17:36, 17 April 2020
| The following in-game bug has been reported to DBG: |
| It can happen that the zone is bugged and you can't click on the wheels at all. It's "best" to right click the wheels before you craft the parts for the Hackbot 3000. if you can't examine them zone out reset the zone and do it again. |
|
| Journal Category | Tradeskill (AA) | ||||
| Introduced | LU105 | ||||
| Journal Level | 110 (Tier 12) | ||||
| Journal Difficulty | Solo | ||||
| Starting Zone | Plane of Magic more | ||||
| How to Start | Receive mail from Druzzil Ro, then speak to her in Plane of Magic at ( -765, 344, 1093 ) . | ||||
| |||||
NOTE:  A discussion page exists which may contain more information A discussion page exists which may contain more information
| |||||
What does this information mean?
Notes

- The combines for this timeline are VERY long, without potions they are taking 3-5 minutes EACH. Plan accordingly and take some 'Progress Potion' or 'Potion of Innovation'. If you "twist" the reaction arts during the combine, you can gain a lot of extra progress to make the combine faster at the cost of mana.
- Summary: First you're making EMDs to drain bots of power so you can get by them. Then you enter the Lab (Where Gears in the Machine ends) and ultimately the goal is to get to the central lab and get the plans. However, the central lab is locked by a combination stored in the disabled bots lying around. You meet Meldrath's ghost in the control room, and must fix the Hackbot so it can read the status of the other bots, which gives you the combination to the center room. As you go, you drain dangerous bots of power, and vent steam before entering certain hallways. After all 6 binary bots are found, return to control room, enter combination, go to the central lab, disable the 5 pillars with EMDs, pick up the plans, exit the zone. Talk to NPCs, done.
Required Materials
Bring at least:
- 100 etherium
- 100 gnarled entwood
- 100 golden ember
- 100 plumewit hide
- 100 storm stalk
- 80 Celestial Coal
- 25 Celestial Filament
- (Note: Because this quest is currently buggy, you might want to bring 2 or 3 times this amount for convenience. Materials for each quest changes significantly later on.)
Required Materials for Entire Questline
For those who like to stock up ahead of time, you may just want to pick up stacks of 800 each of the common materials (if you have a harvest box). Otherwise, plan on at least:
Common Materials
- 50 deadly mushroom
- 200 etherium
- 150 gnarled entwood
- 250 golden ember
- 50 nightmare cichlid
- 150 plumewit hide
- 50 rock fern
- 150 storm stalk
Rare Materials
Fuel
- 50 Celestial Candle
- 625 Celestial Coal
- 25 Celestial Filament
- 50 Celestial Incense
- 50 Celestial Kindling
Steps
- Enter the Coliseum of Valor through the portal at ( -786, 345, 1118 ) .
- Enter Plane of Innovation: Security Measures [Tradeskill] through the portal at ( -94, 3, 164 ) .
- NOTE: The instance is filled with aggro mobs. They can (and need to be) avoided. They cannot be fought successfully, but if you are very fast, you can FD.
- Speak to Meldrath the Marvelous at ( -76, -8, 95 ) .
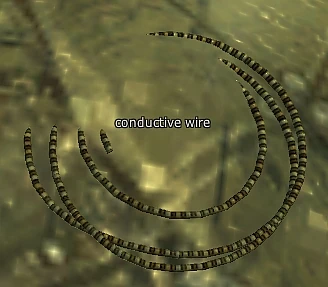
- Harvest the following: (The nodes can be tracked with Track Harvestable but you don't really need it as they can be easily seen on and around all of the big piles of junk. They also respawn quickly. Reminder: the flying bots are not aggro. The standing ones are.)
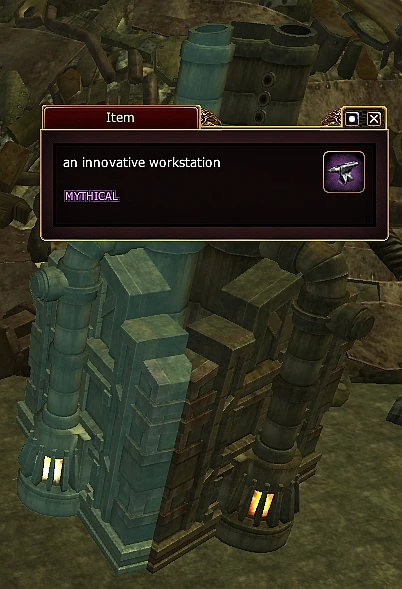
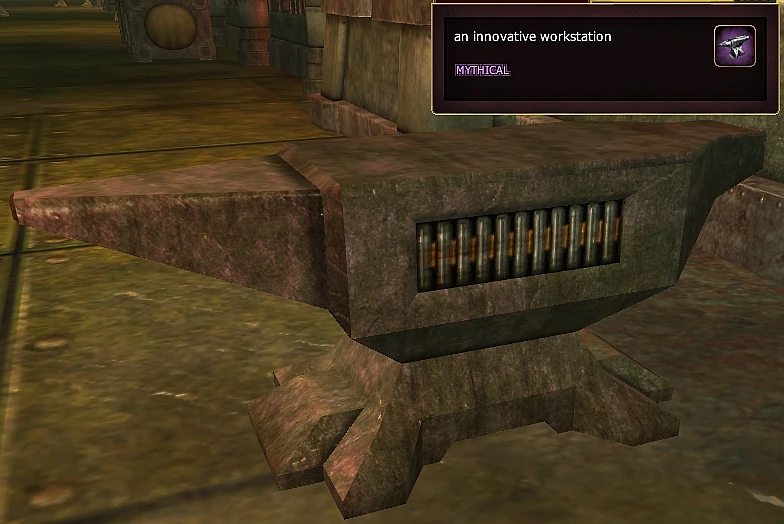
- Craft an Electric Manaetic Device (EMD) on an innovative workstation at ( -114, 6, -156 ) or ( 240, 3, -165 ) .


an innovative workstation
- These will drain power when placed near robots and disable them. They will also drain your power and can be destroyed when they are no longer useful.
- Each combine (which taken to Pristine yields 10 EMDs) requires:
- 10 storm stalk
- 10 coiled spring
- 10 length of conductive wire,
- 10 power node
- 50 Celestial Coal
- Recommendation: harvest 30ea. so you can have 30 EMDs on your person, and just zap all of the unavoidable Clockworks that get in your way! (Note: save 5ea. for last room)
- There are 3 places where you "need" to use em (1) at the small crossing in the middle top right hallway, (1) in the top left hallway and (1) in the top right Hall way.
- Each combine (which taken to Pristine yields 10 EMDs) requires:
- Speak to Meldrath the Marvelous at ( 23, 21, -285 ) .
- The door at ( 71, 4, -89 ) or ( 10, 4, -122 ) will get you to the back room.
- Use caution, you may need to wait for mobs to path out of the way to proceed. The mobs aggro ranges are fairly small.
- Proceed through the door that opens behind Meldrath the Marvelous and head to his new location at ( 30, 3, -564 ) .
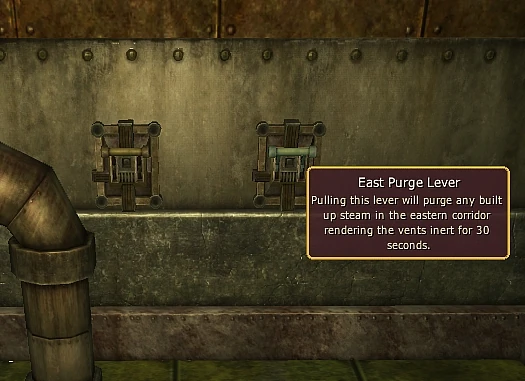
- There are two levers at the end of the hallway at ( 25, 7, -354 ) .

West & East Purge Levers - Pulling this lever will purge any built up steam in the western/eastern corridor rendering the vents inert for 30 seconds.
- The levers are used to (temporarily) deactivate the steam vents in the east and west halls. After pulling a lever, wait for the red circles and bubbles to dissipate before proceeding down that hall. Watch your chat window for updates on the safety of hallways. If you know the Tik-Tok language, the levers tell you they will reset in 30 sec.
- There are matching levers at ( 93, 7, -343 ) and ( -43, 8, -342 ) to pull when going into the hallways from the opposite directions.
- Use EMDs to deactivate mobs you cannot avoid. You will need to place the EMD and have the mob walk near it. The range on the EMD is about 10m. Multiple robots can be affected by a single EMD. Be sure to save 5 EMDs for the final quest step.
- If you pull the mob through, be sure to back a good way away, as the mob will move quite a distance before falling.
- There are two levers at the end of the hallway at ( 25, 7, -354 ) .
- Speak to Meldrath the Marvelous at ( 30, 3, -564 ) .
- Note: This step gives tradeskill XP
- Collect the following:
- Note: your quest journal does not tell you that you have to collect these 3 items before you can craft. If you get a message 'can't craft while in combat, use Esc, /yell, FD or Evac.
- Find & carry the Chassis shell at ( -63, -3, -460 ) to craft the Chassis for the Hackbot 3000.
- WARNING! Epic x4 Clockwork on other side of door near this /loc. Do NOT open door, place EMD at door, wait few seconds after activation, then proceed to item which is just inside room.
- This combine requires:
- 1 chassis shell

chassis shell
- 50 golden ember
- 50 gnarled entwood
- 50 plumewit hide
- 25 Celestial Coal.
- 1 chassis shell
- This combine requires:
- Find and carry the Shorted circuitry at ( 106, -6, -424 ) to craft the Circuitry for the Hackbot 3000.

shorted circuitry
- WARNING! Epic x4 Clockwork on other side of door near this /loc. Do NOT open door, place EMD at door, wait few seconds after activation, then proceed to item which is just inside room.
- This combine requires:
- 1 shorted circuitry
- 50 etherium
- 50 storm stalk
- 50 plumewit hide
- 25 Celestial Filament.
- This combine requires:
- Find the Misshapen gears at ( 150, 4, -424 ) to craft the Gears for the Hackbot 3000 and craft all three of the items on an innovative workstation which can be found near ( 160, 4, -424 ) next to the Misshapen gears you just picked up.

misshapen gears

an innovative workstation
- This combine requires:
- 1 misshapen gears
- 50 golden ember
- 50 etherium
- 50 gnarled entwood
- 25 Celestial Coal
- This combine requires:
- Return to ( 18, 3, -565 ) and right-click to install the crafted components on Hackbot 3000.
- Summon Hackbot 3000; The Ability is in your knowledge book Abilities.
- Now that Hackbot 3000 is following you, when you approach a Binary Control Bot (looks like a disabled robot sitting on the floor), the robot will declare its status as true or false. Make a note of the bot's number and status (such as II/T).

Binary Control Bot
- Note: Roman numerals, XXXII (32), XVI (16), VIII (8), IV (4), II (2), I (1)
- If you right-click the Hackbot 3000 and select 'Check Status" it will report the True/False responses for each bot
- Don't forget to turn off the steam pipes each time go up and down these halls. They don't stay off for very long.
- The suggested order is First, Fifth, Sixth, Third, Fourth, Second to avoid back tracking.
- First (Binary Control Bot XXXII): ( -48, -7, -490 )
- Second (Binary Control Bot XVI) : ( 85, -7, -463 )
- Third (Binary Control Bot VIII) : ( 127, -3, -361 )
- Fourth (Binary Control Bot IV) : ( 189, -3, -495 )
- Fifth (Binary Control Bot II) : ( -92, 4, -444 ) (climb the boxes to get to this one)
- Sixth (Binary Control Bot I) : ( -132, -3, -513 )
- Return to ( 18, 3, -565 ) . (The control room with Meldrath's ghost.)
- Right-click and examine the geared wheels on the control consoles
- for each terminal, if the bot with the same number said "true" then turn clockwise, otherwise, leave it alone. NOTE: You can right-click on the hackbot to recheck the true/false responses.
- When they are correct: 'You hear a rubbing against metal, as a door opens in the distance!'
- Terminal XXXII - 32: ( 5, 3, -548 )
- Terminal XVI - 16: ( 10, 3, -548 )
- Terminal VIII - 8: ( 15, 3, -548 )
- Terminal IV - 4: ( 34, 3, -548 )
- Terminal II - 2: ( 39, 3, -548 )
- Terminal I - 1: ( 44, 3, -548 )


- Exit the control room and go to ( 24, -7, -466 ) .
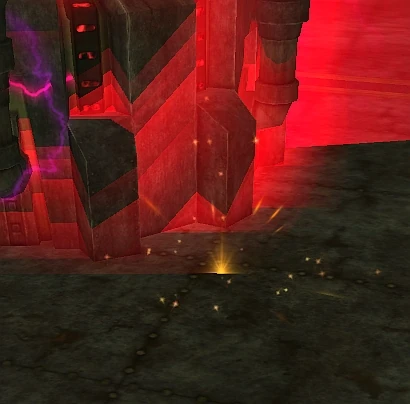
- Place an EMD on the gold spot in front of each of the 5 pillars. Do NOT enter the red force field.
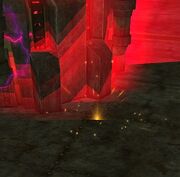
EMD placement point
- ( 24, -7, -456 )
- ( 63, -7, -446 )
- ( 60, -7, -397 )
- ( 60, -7, -397 )
- ( -16, -7, -397 )
- Each one you place will give the message 'The EMD has disabled one of the defenses in the main room. There are # left to disable'
- Collect Meldrath the Malignant's Contraption Schematics at ( 20, -5, -377 ) .

Meldrath the Malignant's Contraption Schematics
- Return to Druzzil Ro ( -5, 6, 3 ) in the Coliseum of Valor using the portal IN the room at ( 24, -7, -411 ) .
- Note: The following step gives tradeskill XP
- Speak to Varig Ro (a roamer in this zone) in the Coliseum of Valor. He wanders the outer ring. Look for the book on your map.

Rewards
- At least 11p 21g 53s 75c 48,000 status
Note: If you do this quest with double exp and full vit and a exp potion %100 on you will get over four levels, so level 100 to 104 and a bit at the mid-point. If you use Adept Hands just before you turn in the rods to Varig Ro, you might reach level 110.